If you’re trying to use your Lexmark scanner to digitize documents, you’re not alone. Many users need a clear, step-by-step guide to scan from the printer to a computer or save as PDF. Whether you’re using a Lexmark CX331, MX series, or another multifunction model, this guide shows exactly how to set up, configure, and perform scans using both the printer’s control panel and your Windows PC.
By the end, you’ll be able to scan documents quickly and reliably, whether for archiving, sharing, or printing. Let’s get started.
Update Lexmark Scanner Firmware Before Scanning
Before scanning, ensure your Lexmark scanner runs the latest firmware. Outdated versions can block key features like Scan to Computer or prevent network connectivity.
Access Printer Web Interface
- On the Lexmark printer’s home screen, locate the IP address.
- Open any web browser on a connected computer.
- Type the IP address into the address bar and press Enter.
Update Firmware via Web Portal
- Navigate to Settings > Device > Update Firmware.
- Click I agree to accept the license terms.
- Select Start update and wait for the process to complete.
Do not turn off the printer during the update process. After reboot, check if new scanning options appear on the touchscreen or LCD.
Install Lexmark Scanback Utility
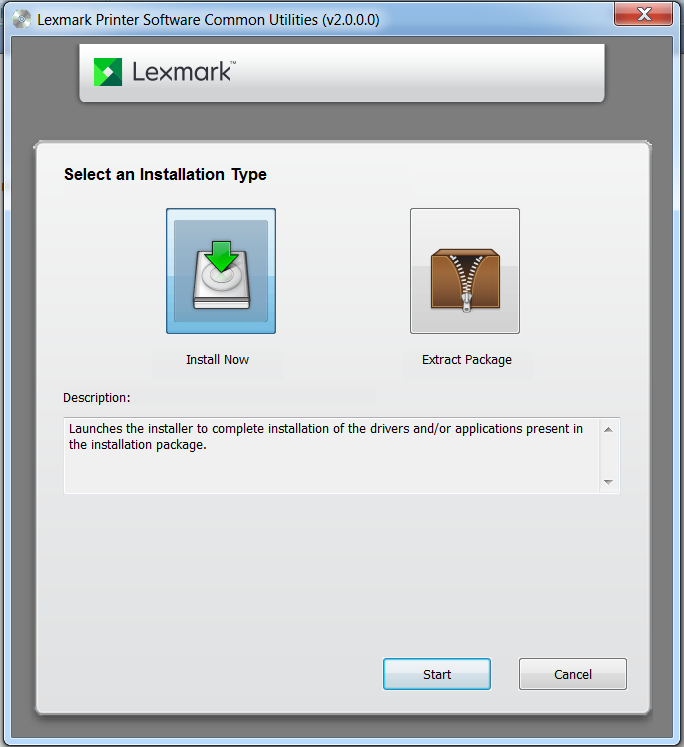
The Lexmark Scanback Utility is required to scan directly from the printer to your computer. It enables folder destinations, custom profiles, and one-touch scanning.
Download and Run Installer
- Visit lexmark.com/downloads.
- Enter your printer model (e.g., Lexmark CX331).
- Find and download Lexmark Scanback Utility.
- Run the installer and click Next through the prompts.
Manually Add Printer If Needed
If the utility does not detect your device, click Setup, select Add Printer, and enter the printer’s IP address to connect. Once installed, the Scanback icon appears in the system tray, indicating it is active.
Configure Scan Profiles for Reuse

A scan profile saves settings so you do not reconfigure every time. Use it to define format, size, folder destination, and file naming.
Set Profile Options in Scanback
In the Scanback Utility, configure these options:
- Profile Name: e.g., Scan_to_PDF_HR or Invoice_Scans
- Document Size: Choose Letter, A4, Legal, etc.
- File Format: PDF is recommended for documents
- Destination Folder: Pick a local or network folder
- File Naming: Use patterns like Scan_YYYYMMDD_HHMMSS
Pro Tip: Create separate profiles for different departments like Accounting, HR, or Legal.
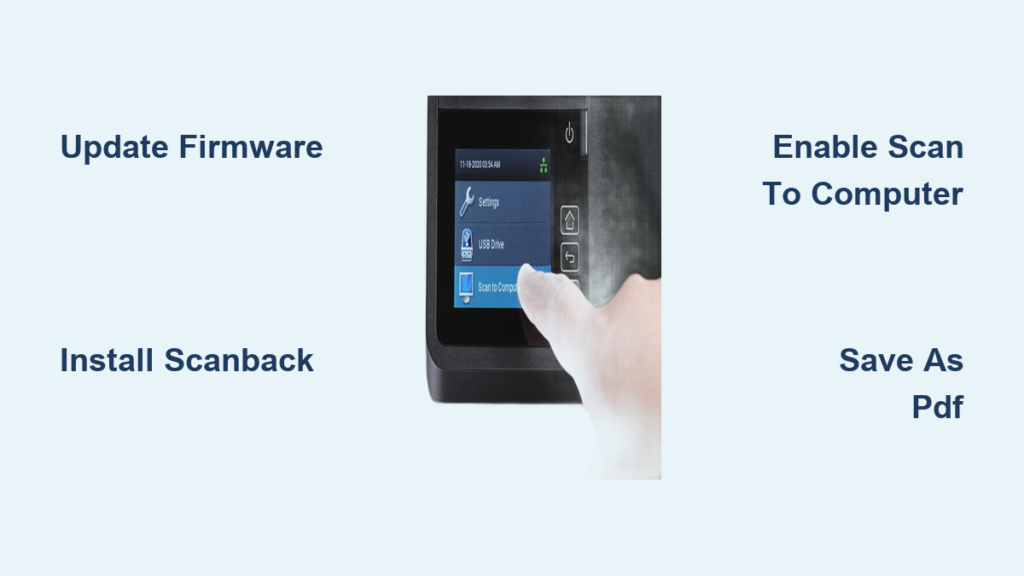
Enable Scan to Computer on Home Screen
On many Lexmark models, the Scan to Computer option is hidden by default. You must manually enable it to use this feature.
Make Icon Visible
- On the printer touchscreen, go to Settings > Device > Visible Home Screen Icons.
- Select Scan to Computer.
- Tap Display.
Now, the Scan to Computer shortcut appears on the home screen for quick access.
Scan Using the Control Panel
Once the profile is set and the icon is visible, scanning directly from the printer is fast and simple.
For 2-Line LCD Models
- Press Shortcuts on the panel.
- Scroll to Scan to Computer and press Select.
- Choose your saved profile.
- Press Start to begin scanning.
For Touchscreen Models
- Tap Scan to Computer on the home screen.
- Select the desired scan profile.
- Tap Scan.
The file saves automatically to the folder specified in your profile.
Load Documents: Flatbed vs ADF
Where you place the document affects scan speed and quality.
Use the Flatbed Scanner
The flatbed is best for thick paper, photos, and fragile documents. Open the lid, place the page face-down on the glass, and align with the top-left corner.
Use the ADF
The Automatic Document Feeder is best for multi-page documents (up to 50 sheets depending on model). Fan pages, align at the edge, and insert face-up into the ADF tray.
Never force wrinkled or stapled pages into the ADF as this can jam the scanner.
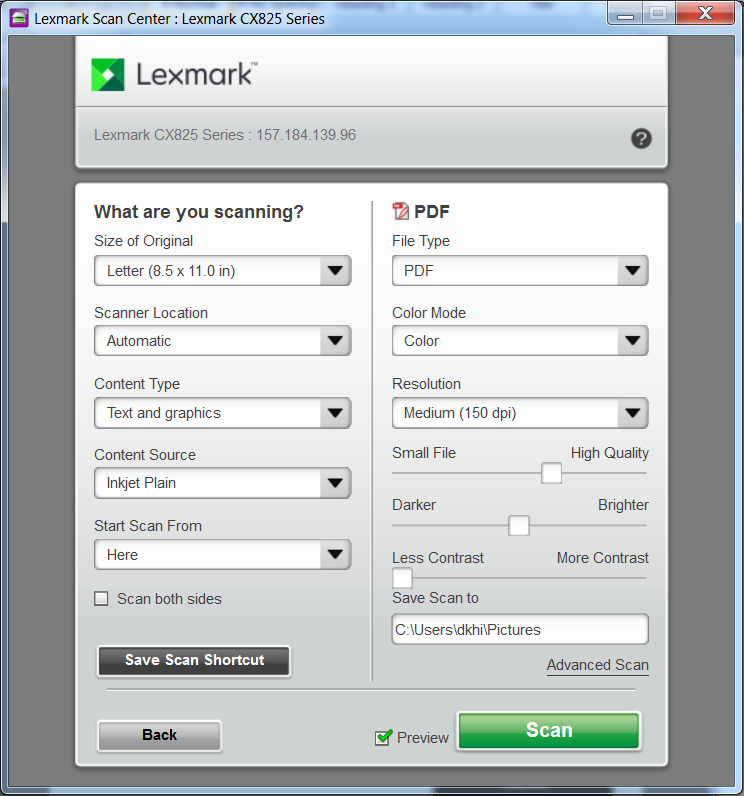
Scan from All-In-One Center Software
You can also initiate scans from your computer using the Lexmark All-In-One Center. This method gives full control over file naming and save location.
Steps to Scan from PC
- Place the document on the flatbed or in the ADF.
- On your Windows PC, open Start Menu > Programs > All-In-One Center.
- In the SCAN section, click the dropdown and select FILE.
- Click Scan.
- Choose where to save the file and enter a name.
- Click Save to complete.
This method bypasses preconfigured profiles and lets you choose the destination each time.
Save Scanned Files as PDF
PDF is the most useful format for document sharing and archiving. Here is how to always scan to PDF.
In Scanback Utility
When creating a profile, under File Format select PDF. Enable Combine multiple pages into one file if using the ADF for multi-page documents.
From All-In-One Center
After scanning, the software may prompt you to save as PDF. If not, select PDF from the file type dropdown in the save dialog.
Scanning to PDF keeps text searchable if OCR is enabled on your Lexmark model.
Fix Scan to Computer Not Showing
If the Scan to Computer option is missing, follow these steps to restore it.
Enable via Settings Menu
- On the printer, go to Settings > Device > Visible Home Screen Icons.
- Find Scan to Computer.
- Select Display.
If still missing after enabling, restart the printer.
Reinstall Scanback Utility
- Uninstall the current version from Control Panel.
- Reboot your PC.
- Reinstall the latest Scanback Utility from lexmark.com.
Some models require firmware version 3.0 or higher for this feature to appear.
Resolve Connection and Save Failures
Scans may fail due to network issues, permission errors, or software conflicts.
Troubleshoot Network Issues
Confirm both printer and PC are on the same network (wired or Wi-Fi). Ping the printer’s IP address from the PC by pressing Windows + R, typing cmd, and running ping [printer-ip-address]. If no response, check router settings or reconnect.
Fix Destination Folder Errors
Common reasons scanned files do not save include the folder path no longer existing, user lacking write permissions, or the PC being asleep or offline.
Solutions include using a local folder like C:\Scans instead of a network path for testing. For network folders, right-click the folder, go to Properties > Sharing > Advanced Sharing, and grant Write access. Keep the PC awake by disabling sleep mode in Power Options.
View and Manage Scanned Documents
After scanning, locate and verify your file.
Find the Saved File
- Open the destination folder set in your scan profile.
- Look for a file named like Scan_20250405_1430.pdf.
- Double-click to open in Adobe Reader or your default viewer.
Pro Tip: Sort by Date Modified to find the latest scan quickly.
Organize for Long-Term Access
Create subfolders like Scans/Invoices or Scans/Contracts. Use consistent naming by including date, sender, or document type. Back up important scans to cloud storage like OneDrive or Google Drive.
Supported File Formats and Uses
Lexmark scanners support multiple output types. Choose the right one for your needs.
| Format | Best For | Notes |
|---|---|---|
| Documents, contracts | Compact, searchable, multi-page | |
| TIFF | Archival, legal records | High quality, large file size |
| JPEG | Images, photos | Compressed, smaller size |
| PNG | Graphics with transparency | Lossless, supports alpha channel |
PDF is recommended for most document scanning tasks.
Clean Scanner Glass and ADF
Poor scan quality often results from dirt on the glass or rollers.
Clean the Flatbed
- Lift the document cover.
- Wipe the glass with a lint-free cloth slightly dampened with water or glass cleaner.
- Dry thoroughly before closing.
Clean the ADF Rollers
- Use a dry, clean sheet of paper or a specialized scanner cleaning sheet.
- Feed it through the ADF several times.
- For sticky residue, use a dry rubber roller cleaning pen available online.
Clean monthly or when you notice streaks, smudges, or paper feed issues.
Best Practices for Reliable Scanning
Follow these tips to avoid errors and improve efficiency.
Name Profiles Clearly
Use descriptive names like Scan_to_PDF_Desktop, HR_Documents_Network, or Color_Scans_JPEG. This helps multiple users identify the correct option.
Test Before Bulk Scanning
Always run a test scan of one page before scanning a full batch. Check alignment, brightness, and file save location. Confirm the file opens correctly.
Keep Software Updated
Check for Scanback Utility updates quarterly. Reinstall after major Windows updates as outdated software can break scan functionality after system upgrades.
Get Help: Lexmark Support Resources
If problems persist, use official Lexmark support tools.
Visit Support Portal
Go to lexmark.com/support for these resources:
- Drivers and Downloads for latest firmware and software
- Interactive Manuals for step-by-step setup guides
- Contact Support for chat, email, or phone assistance
- Safety and Regulatory Info for model-specific notices
You can also register your device for warranty tracking and update alerts.
Key Takeaways for Using Your Lexmark Scanner
Using a Lexmark scanner does not have to be complicated. With the right setup including updated firmware, installed Scanback Utility, and properly configured scan profiles, you can scan documents to your computer or save as PDF in seconds. Whether using the control panel or PC software, follow this guide to ensure smooth, reliable performance every time.
Keep your scanner clean, your software current, and your profiles organized for hassle-free digital document management. Test scans before processing important documents, and always verify that your destination folder is accessible and has proper permissions.
Frequently Asked Questions About Lexmark Scanner Use
How do I connect my Lexmark scanner to my computer?
Ensure your Lexmark printer and Windows computer are on the same network. Install the Lexmark Scanback Utility from lexmark.com/downloads. The utility will detect your printer automatically, or you can manually add it using the IP address.
Why does Scan to Computer not appear on my Lexmark printer?
The Scan to Computer option is often hidden by default. Go to Settings > Device > Visible Home Screen Icons on your printer touchscreen, select Scan to Computer, and tap Display to make it visible.
Can I scan to PDF using my Lexmark scanner?
Yes. In the Scanback Utility, create a profile and select PDF as the File Format. Enable Combine multiple pages into one file if scanning multi-page documents from the ADF.
What do I do if my scanned files are not saving?
Check that the destination folder exists and you have write permissions. Verify the printer and computer are on the same network. Ensure the computer is powered on and not in sleep mode.
How do I update my Lexmark printer firmware?
Locate the printer IP address on the home screen, enter it in a web browser on your computer, and navigate to Settings > Device > Update Firmware. Click I agree and select Start update.
Which file format is best for scanning documents?
PDF is recommended for most document scanning tasks because it is compact, searchable, and supports multiple pages. Use TIFF for archival purposes requiring high quality, or JPEG for photos and images.