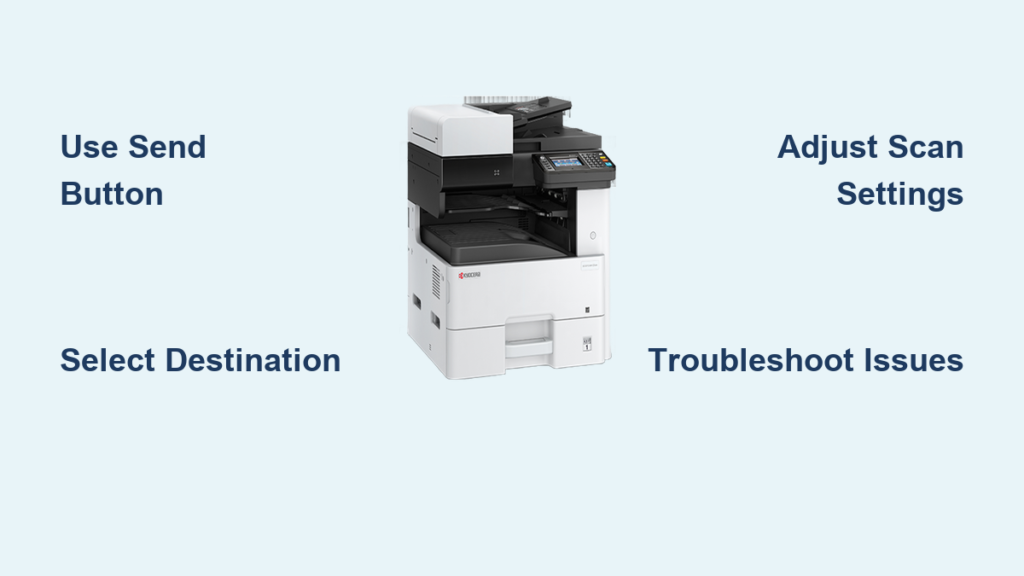
If you’re wondering how to use a Kyocera scanner, you are not alone. Whether in an office or home environment, Kyocera multifunction printers (MFPs) like the TASKalfa and ECOSYS series offer powerful scanning capabilities, but only if you know how to access them correctly. The core function, labeled Send on the control panel, allows you to scan documents and send them to email, network folders, USB drives, cloud services, and more. This guide walks you through every essential step, from basic scanning to advanced configurations like Scan to Folder and OCR, so you can maximize your device’s potential.
By the end, you will learn how to set up secure destinations, choose the right file formats, troubleshoot common issues, and use built-in tools like Kyocera SmartScan and Command Center RX. You will be able to scan confidently, securely, and efficiently, no matter your technical skill level.
Access the Send Function
The Send button is your gateway to all scanning operations on Kyocera MFPs. It initiates document digitization and transmission to selected destinations. Understanding how to access this function is the first step toward mastering your scanner.
Choose Input Method: Flatbed or ADF
Kyocera scanners support two input methods for different document types:
- Flatbed: Ideal for single, fragile, or bound documents. Place the document face-down on the glass.
- ADF (Automatic Document Feeder): Best for multi-page batches. Load originals face-up in the tray.
Look for the document icon etched near the glass or feeder. Misalignment causes skewed scans. Always close the scanner lid before starting. Dust or smudges on the glass reduce image quality, so clean monthly with a microfiber cloth.
Navigate to Send Menu
On the control panel, follow these steps:
- Tap Send.
- The screen displays available destinations: email, folder, USB, and more.
- Use arrow keys or touchscreen to select your destination.
If Send is missing, press Home first. Some models hide it behind a menu. The system defaults to last-used settings, so always verify resolution, color, and format before scanning.
Select Scan Destination
After pressing Send, choose where your scanned file goes. Kyocera supports multiple output paths for flexibility in any workflow.
Email, Folder, or USB: Pick Your Path
Common destination options include:
- Email Address: Sends as an attachment via SMTP.
- Network Folder (SMB/FTP): Saves directly to a shared drive.
- Removable Memory (USB): Stores on a flash drive without needing a PC.
- Personal Folder: Requires login and stores in user-specific space.
- OneTouch Keys: Pre-programmed shortcuts for frequent destinations.
OneTouch Keys can store up to 100 entries, set by IT admins for fast access. For one-time scans, use manual entry. For repeat use, save to the address book.
Use Address Book for Fast Access
To avoid retyping emails or paths:
- Tap Send, then Address Book.
- Browse or search by name, department, or number.
- Select recipient and press OK.
- Load documents and tap Start.
Label entries clearly, such as Finance Team instead of JohnDoe@company.com. Admins can pre-load up to 1,000 entries for enterprise-wide consistency.
Scan to Email: Send Digitally
Scanning to email turns paper documents into instant digital attachments, ideal for approvals, records, or remote collaboration.
Choose Recipient from Address Book
For saved contacts:
- Tap Send, then Address Book.
- Scroll or search for the contact.
- Select and press OK.
- Load originals (ADF or flatbed).
- Press Start.
The scanner uses default settings, usually PDF, 300 DPI, color or grayscale. Expect 10 to 20 seconds per page, depending on resolution. Files arrive as attachments, typically named Scan_YYYYMMDD_HHMMSS.pdf.
Enter Email Manually for One-Time Use
To send to a new recipient:
- Tap Send, then Email Address Entry.
- Use the on-screen keyboard to type the full address.
- Press OK.
- Optionally tap Add to Address Book for future use.
- Load documents and press Start.
Typos prevent delivery, so double-check spelling before sending. Only one email can be entered at a time. For multiple recipients, use the address book.
Scan to USB: Save Without a PC
Use a USB drive to scan directly from the machine, perfect for offline use or secure transfers.
Insert USB and Select Memory Mode
- Plug a standard USB 2.0 or 3.0 flash drive into the front USB host port.
- On the home screen, tap Send, then Removable Memory.
- When prompted, confirm with Yes.
- Choose Store File.
Supported devices include flash drives up to 64 GB tested. Avoid encrypted, password-protected drives or external hard drives. The system auto-detects the drive. If not recognized, reinsert or try another USB.
Choose File Format and Start Scan
After selecting storage:
- Tap File Format on the second settings screen.
- Choose from PDF, High-Compression PDF, TIFF, JPEG, XPS, Word, Excel, or PowerPoint.
- Press OK.
- Load documents into ADF or on flatbed.
- Press Start.
Scanned files save to the root directory of the USB. Files are named automatically, such as IMG001.pdf. Rename later on a PC if needed.
Retrieve Files from USB
After scanning:
- Return to home screen.
- Tap Removable Memory.
- Browse files using arrow keys.
- Preview if supported before removing the drive.
Always eject via the panel menu before unplugging to prevent data loss.
Scan to Network Folder (SMB): Save to PC
Direct scanning to a shared folder on a Windows PC via SMB protocol streamlines document workflow. Both Kyocera device and PC must be on the same network.
Set Up Shared Folder on Windows
To receive scans:
- Create a folder, such as C:\Scans.
- Right-click, then Properties, then Sharing, then Share.
- Add a user, such as ScannerUser, with Read/Write access.
- Click Advanced Sharing and enable Share this folder.
- Under Permissions, grant Full Control to the user.
Use a local account, not a Microsoft online account, to avoid authentication issues. Ensure the network profile is set to Private, not Public, so the PC is discoverable.
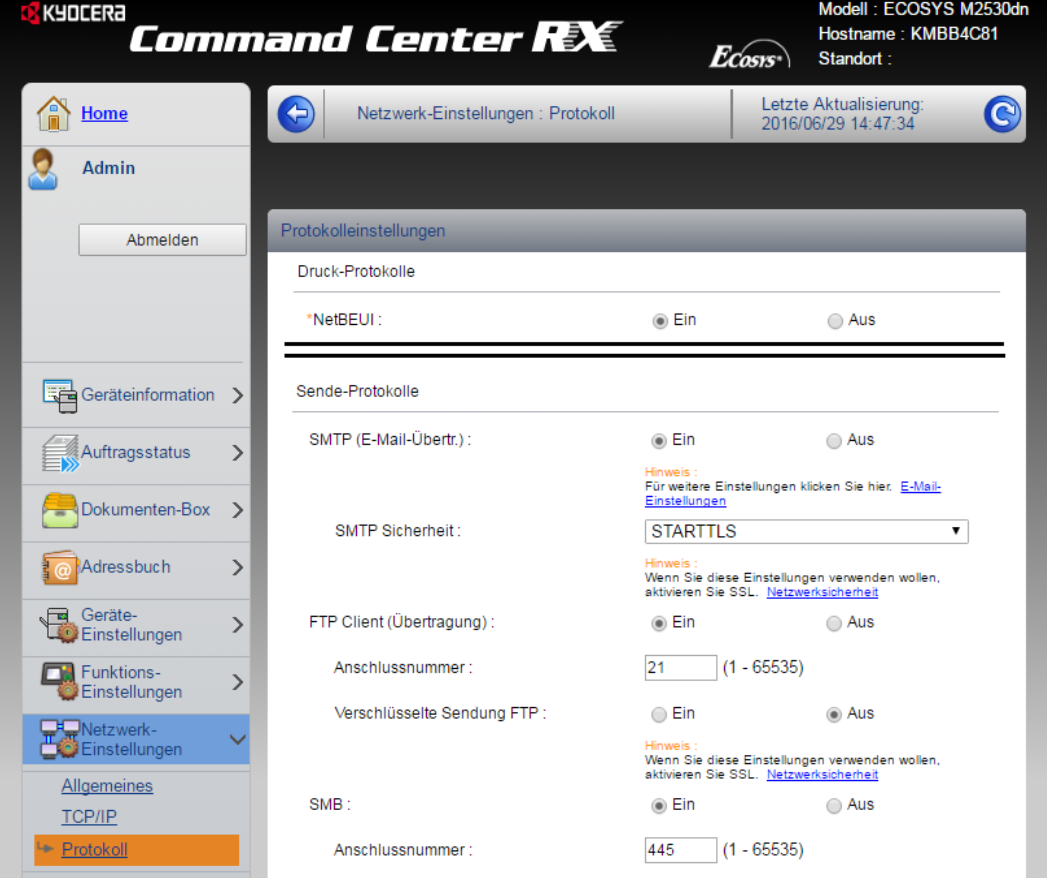
Configure SMB on Kyocera Device
Via the web interface:
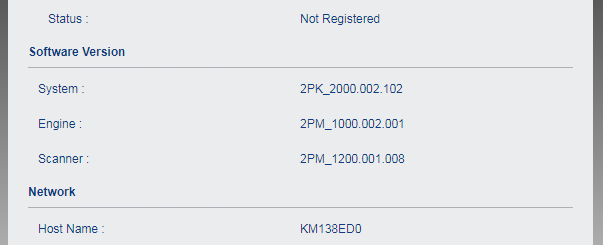
- Find the Kyocera IP address by pressing Device Information or printing a Status Page.
- Open a browser and enter the IP address.
- Log in as admin.
- Go to Address Book, then Machine Address Book, then Add (+).
- Select Scan to SMB.
Fill in these fields:
- Host: PC name or IP address (e.g., 192.168.2.100)
- Port: 445 (default)
- Path: Folder name only (e.g., Scans)
- Login Name: Local username (e.g., ScannerUser)
- Password: Account password
Click Test. Success shows a confirmation message. Failure means checking firewall, credentials, or PC sleep mode. Save with Submit.
Perform Test Scan to Folder
- Place a test page in the ADF.
- Tap Send and select the new SMB destination.
- Press Start.
- Check the Scans folder on the PC.
If the file does not appear, confirm the PC is on and not asleep. Ensure Windows Firewall allows SMB on ports 445 and 139. Re-test the connection in the web interface.
Adjust Scan Settings

Customize output quality, size, and layout before scanning to ensure the best results for your needs.
Set Color, Resolution, and Density
On the Quick Setup tab after selecting Send:
| Setting | Recommended Use |
|---|---|
| Color Selection | Use Color for images, Grayscale for text-only |
| Scan Resolution | 300 DPI for standard docs, 600 DPI for small text or fine details |
| Density | Adjust if original is too dark or faded |
Higher resolution increases file size, so use 600 DPI sparingly. Use Auto Color to let the scanner detect color content and optimize accordingly.
Enable Double-Sided and Continuous Scanning
For multi-page documents:
- Two-Sided Book Original: Enables duplex scanning via ADF. Captures both sides automatically.
- Continuous Scan: Bundles mixed paper types into a single file, such as multi-page PDF.
Look for the two-sided icon on the ADF. If missing, the setting is disabled. These options appear under the Original tab or More menu.
Use Advanced Features
Unlock powerful tools like OCR, password protection, and certified PDFs for professional document management.
Enable OCR for Editable Text
Optical Character Recognition converts scanned images into searchable or editable text. This is required for exporting to Word, Excel, or PowerPoint and for creating searchable PDFs.
To enable:
- Tap More, then OCR.
- Select language, such as English.
- Choose output format, such as Word.
- Start the scan.
Accuracy depends on clean scanner glass, 300 or higher DPI resolution, and clear, printed text. Handwritten content rarely OCRs correctly.
Apply Password Protection
Secure sensitive scans with two password types:
| Type | Function |
|---|---|
| Open Password | Required to open the file |
| Restriction Password | Allows viewing but blocks printing, copying, or editing |
Set via More, then Security Settings. Use restriction passwords for internal sharing and open passwords for confidential external delivery. Both can be used together for maximum security.
Create Certified PDFs
Generate tamper-proof documents for legal, compliance, or audit use. Certified PDFs cannot be edited, compressed, or encrypted after creation. This is ideal for contracts, invoices, or regulatory submissions.
Enable under More, then Certified PDF. Once certified, changes are impossible, even by the creator.
Customize File Naming and Metadata
Automate organization with dynamic job naming for network or folder scans.
Set Job Name, Number, Date, and Time
- Go to Advanced Settings, then Job Naming.
- Enable fields like Job Name, Job Number, Date, and Time.
For example, Quarterly_Report_Q2-2025_2025-04-05_14-30.pdf. This eliminates manual renaming in shared environments and helps with tracking submissions, audits, or client deliverables.
Use Kyocera SmartScan (If Available)
On select TASKalfa models, SmartScan offers simplified, icon-based navigation for intuitive operation.
Navigate with Visual Icons
Features include:
- Large, intuitive icons for Scan to Email, Folder, USB, Fax, and Personal Folder
- No PC software required
- Designed for quick, error-free use
This is only available on compatible models, so check specifications. It is ideal for front-desk staff or non-technical users.
Access SmartScan Interface
If installed:
- Tap Home.
- Select the SmartScan icon.
- Choose destination and scan.
No complex menus are required. Just point and click.
Change Output File Format
Choose the right format for your needs, whether sharing, archiving, or editing.
PDF, TIFF, JPEG, or Office Files?
| Format | Best For |
|---|---|
| Universal sharing and archiving | |
| High-Compression PDF | Email attachments with limited storage |
| TIFF | High-quality image preservation |
| JPEG | Single images or web use |
| Word/Excel/PPT | Editable exports (requires OCR) |
To change:
- Tap Send, then Original Sending Data Format, then File Format.
- Select the desired option.
- Confirm, choose destination, and scan.
Set a default format in Quick Setup to avoid repeated changes. Use High-Compression PDF for large documents sent via email.
Troubleshoot Common Issues
Fix problems fast with targeted solutions when scanning does not work as expected.
Scan Fails to Send: Diagnose Connection
Possible causes include:
- Network down
- Incorrect IP or hostname
- Firewall blocking SMB or email
Fix by re-testing the connection in the web interface. Verify the device and PC are on the same network. Check that the firewall allows ports 445 for SMB and 25 or 587 for SMTP. A quick test is to ping the Kyocera IP from a PC command prompt.
File Missing in Folder: Check Permissions
If the scan appears successful but the file is missing:
- Confirm Full Control permission for the scanner user.
- Ensure SMB 1.0 or CIFS is enabled on Windows for older MFPs.
- Avoid Microsoft online accounts and use local accounts instead.
Sleep mode halts SMB access, so keep the PC awake.
Poor Image Quality: Adjust Settings
For blurry, dark, or skewed scans:
- Increase resolution to 300 to 600 DPI.
- Adjust density for contrast.
- Clean scanner glass and ADF rollers.
- Ensure the document is flat and aligned.
For OCR failure, improve lighting, resolution, and font clarity.
Access Manuals and Support
Get model-specific help when needed from official Kyocera resources.
Download Operation Guide
For exact steps:
- Visit the Kyocera Support Download Centre.
- Enter your model, such as TASKalfa 4000i.
- Select Documents, then User Manual, then Operation Guide.
- Download the PDF.
Key sections include Using Various Functions, then SEND, and Operation on the Machine. The guide includes clickable table of contents, error codes, screenshots, and firmware details.
Contact Kyocera Support
For unresolved issues:
- Australia: Call 135 962 and press Option 3.
- New Zealand: Call 0800 459 623.
- Hours: 9:00 AM to 5:00 PM local time, Monday to Friday.
Or use live chat on the Kyocera website, found in the bottom-right corner. Support covers SMB and email setup, OCR problems, firmware updates, and address book management.
Key Takeaways for Using Your Kyocera Scanner
Mastering how to use a Kyocera scanner starts with the Send function and expands to smart configuration of destinations, formats, and security. Whether scanning to USB, email, or network folders, always test new settings before relying on them in production environments. Use local accounts for SMB to avoid authentication issues, and keep firmware updated via Command Center RX for the latest features and security patches. Clean the scanner regularly, use 300 DPI for standard documents, and reserve 600 DPI for detailed work. Leverage OCR and password protection when handling sensitive documents, and consult the Operation Guide for model-specific details. With this guide, you are equipped to scan efficiently, securely, and without frustration.
Frequently Asked Questions About Using a Kyocera Scanner
How do I start scanning on my Kyocera machine?
Press the Send button on the control panel to access scanning functions. This opens the main scanning menu where you can choose destinations like email, USB, or network folders.
Can I scan directly to a USB drive?
Yes. Insert a USB flash drive into the front USB host port, select Removable Memory from the Send menu, choose Store File, select your file format, and press Start. The scanned file saves to the drive root directory.
What is the default scan resolution on Kyocera scanners?
The default resolution is 300 DPI, which works well for standard documents. Use 600 DPI for small text, fine details, or when OCR is required.
Why is my scan not appearing in the network folder?
Check that the PC is on and not in sleep mode. Verify Windows Firewall allows SMB on ports 445 and 139. Confirm the scanner user has Full Control permissions on the shared folder.
How do I enable OCR for editable text?
Tap More, then OCR on the scan settings screen. Select your language and output format, such as Word or searchable PDF. Ensure the original is clear and scanned at 300 DPI or higher.
Can I password-protect my scanned documents?
Yes. Access More, then Security Settings to set an Open Password (required to open the file) or a Restriction Password (allows viewing but blocks printing or editing). Certified PDFs are also available for tamper-proof documents.