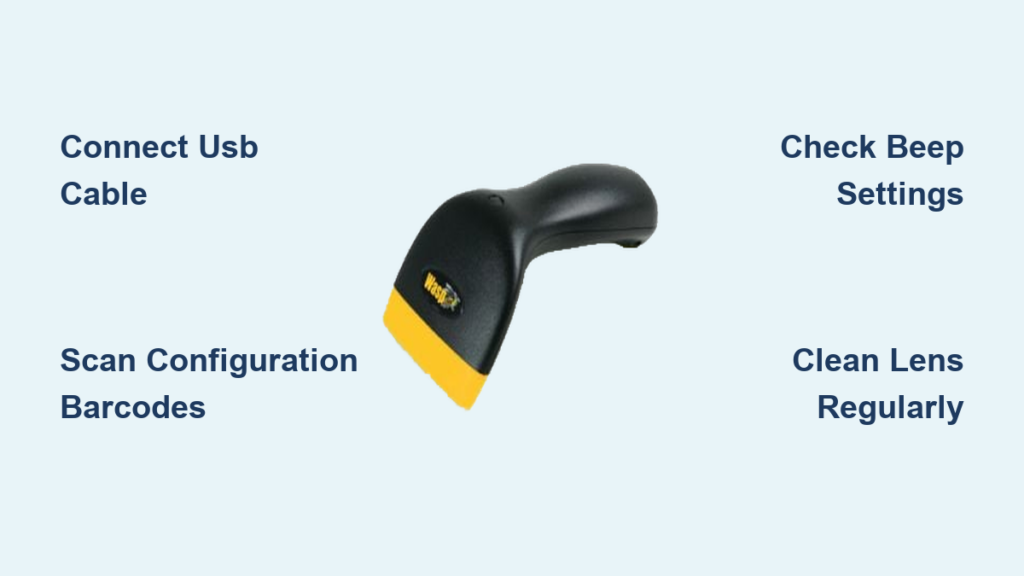
Wasp barcode scanners are reliable tools for businesses and individuals who need to quickly digitize inventory data, track products, or manage assets. Whether you’ve just purchased a new Wasp scanner or need help getting started, this guide walks you through the entire process from unboxing to everyday scanning. You’ll learn how to connect your scanner to a computer, configure the appropriate settings, and troubleshoot common issues that might arise during use.
Unboxing Your Wasp Barcode Scanner
Before you begin setting up your scanner, take a moment to verify that all components are present in the box. Most Wasp barcode scanners come with the scanner unit itself, a USB or serial cable depending on the model, a stand or cradle for hands-free operation, and quick start documentation. Check the packaging for any model-specific accessories that may be included with your particular unit.
Remove all protective materials from the scanner and inspect the device for any visible damage that may have occurred during shipping. Place the scanner in a comfortable position where you can easily access both the scanning button and the cable connections.
Connecting Your Wasp Scanner to a Computer

The connection process varies slightly depending on whether you have a USB, serial, or wireless model, but USB connections are the most common for desktop setups. Locate the appropriate port on your computer, which is typically a USB-A port on the back or side of the machine, and firmly insert the cable connector. Allow your operating system a moment to recognize the new hardware and install any necessary drivers automatically.
For Windows users, the scanner should appear in Device Manager under Human Interface Devices or as a HID-compliant device. Mac users will typically see the scanner recognized immediately without additional driver installation. If your scanner came with software installation discs or required specific drivers, insert those now and follow the on-screen prompts to complete the driver setup.
Configuring Scanner Settings

Most Wasp barcode scanners come pre-configured from the factory to work with common applications, but you may need to adjust certain settings for your specific use case. Access the scanner’s configuration by scanning the configuration barcodes found in the user manual, which allow you to modify options like beep volume, scan mode, and character encoding. Common settings you’ll want to verify include whether the scanner is set to automatically transmit data or requires a trigger press, whether it adds a carriage return after each scan, and whether it’s configured for the correct barcode types you plan to use.
To change a setting, locate the desired barcode in the programming guide, aim the scanner at it, and press the scan button. You’ll typically hear a confirmation beep indicating the setting was accepted. Write down any custom configurations you make so you can reference them later if you need to reset the scanner.
Basic Scanning Techniques
Hold the scanner comfortably in your hand with your index finger resting near the scan button. Position the scanner lens approximately 2 to 6 inches from the barcode, depending on your specific model’s reading range, and aim the laser beam directly across the barcode in a straight line. Press and release the scan button to activate the laser, moving the scanner gradually across the barcode from left to right or right to left.
The scanner will emit a beep sound and typically illuminate a small LED light when it successfully reads the barcode. For best results, hold the scanner steady and ensure adequate lighting in the scanning environment, as poor lighting can affect reading accuracy. Practice with a few different barcode types to get comfortable with the proper distance and angle for your specific model.
Troubleshooting Common Scanner Issues

If your scanner isn’t responding or seems to be malfunctioning, start with the simplest solutions before moving to more complex diagnostics. First, verify that all cable connections are secure and that the cable hasn’t been damaged or bent excessively. Check that the scanner is receiving power if your model requires external power, which is often indicated by a power LED light.
If the scanner reads barcodes but the data doesn’t appear in your application, verify that your application is properly configured to receive input from a barcode scanner. The scanner typically sends data as keyboard input, so ensure your text cursor is active in the desired field before scanning. You may also need to adjust the scanner’s settings to add a prefix or suffix character that your application requires to trigger data entry.
For wireless models, check that the receiver is properly connected and within the specified range of the scanner. Interference from other wireless devices can sometimes cause connectivity issues, so try moving closer to the receiver or removing potential sources of interference.
Maintaining Your Wasp Barcode Scanner
Regular maintenance helps ensure consistent performance and extends the life of your scanner. Keep the scanner lens clean by gently wiping it with a soft, dry cloth whenever dust or debris accumulates. Avoid using harsh chemicals or abrasive materials that could scratch the lens surface. Store the scanner in a protected location when not in use, and consider using the included stand or cradle to prevent the device from being damaged by falls or impacts.
Periodically check the cable connections for signs of wear, especially at the connector points where bending occurs most frequently. Replace any damaged cables promptly to prevent intermittent connectivity issues that can disrupt workflow.
Key Takeaways for Using Your Wasp Barcode Scanner
:format(jpeg))
Successfully using a Wasp barcode scanner involves three core steps: proper physical connection to your computer, verification of configuration settings for your specific application, and consistent scanning technique. Most users can get their scanner operational within minutes by following the basic setup process outlined above. Remember to consult your model’s specific user manual for any unique features or configuration options that may differ from general guidelines. With regular maintenance and proper handling, your Wasp scanner will provide reliable service for years of inventory management and data capture needs.
Frequently Asked Questions About Wasp Barcode Scanners
Why isn’t my Wasp scanner being recognized by my computer?
First, try unplugging and reconnecting the USB cable to a different port, preferably a port directly on the motherboard. If that doesn’t work, check Device Manager on Windows or System Information on Mac to see if the device is appearing at all. You may need to install manufacturer-provided drivers if your operating system doesn’t automatically recognize the scanner.
How do I make my Wasp scanner beep louder or change the sound?
Most Wasp scanners allow you to adjust beep volume and tone through configuration barcodes in the user manual. Look for the “Beep Configuration” or “Audio Settings” section and scan the appropriate barcode for your desired volume level.
Can I use my Wasp scanner with multiple computers?
Yes, you can move the scanner between computers, but you’ll need to repeat the connection and driver installation process on each computer. Wireless scanners can typically switch between receivers on different computers by re-pairing the device.
What barcode types does a typical Wasp scanner support?
Most Wasp scanners support common retail and industrial barcode types including UPC, EAN, Code 39, Code 128, Interleaved 2 of 5, and QR codes, though specific support varies by model. Check your product specifications to confirm compatibility with your specific barcode types.