Is your Lexmark scanner not working while printing still functions normally? You’re not alone. Many users face the frustrating issue where their Lexmark multi-function device (MFP) prints perfectly but fails to scan, whether via USB or Wi-Fi. This problem often appears after a system update, network change, or driver reinstall. The scanner may disappear from apps like Windows Fax and Scan, vanish from Device Manager, or simply show as “unavailable” in settings. The good news is that most Lexmark scanning issues are fixable with the right troubleshooting steps.
This guide walks you through proven solutions, from basic checks to advanced fixes, so you can restore scanning functionality quickly and confidently. We’ll cover how to verify driver installation, enable scanning on the printer menu, restart essential Windows services, update firmware, and configure network settings like IPv6 and TCP/IP. Whether you’re using a Lexmark MC2425, MC3426adw, or another model, these solutions apply across the board. Let’s get your scanner working again.
Check Physical and Network Connections
Verify Power and Cable Connections
Before diving into software fixes, start with the basics. Ensure your Lexmark device is powered on and properly connected. For USB setups, use a fully functioning USB cable that supports data transfer, not a charging-only cable. Plug directly into the computer and avoid USB hubs or extension cables. If the scanner isn’t detected, try a different USB port on your computer.
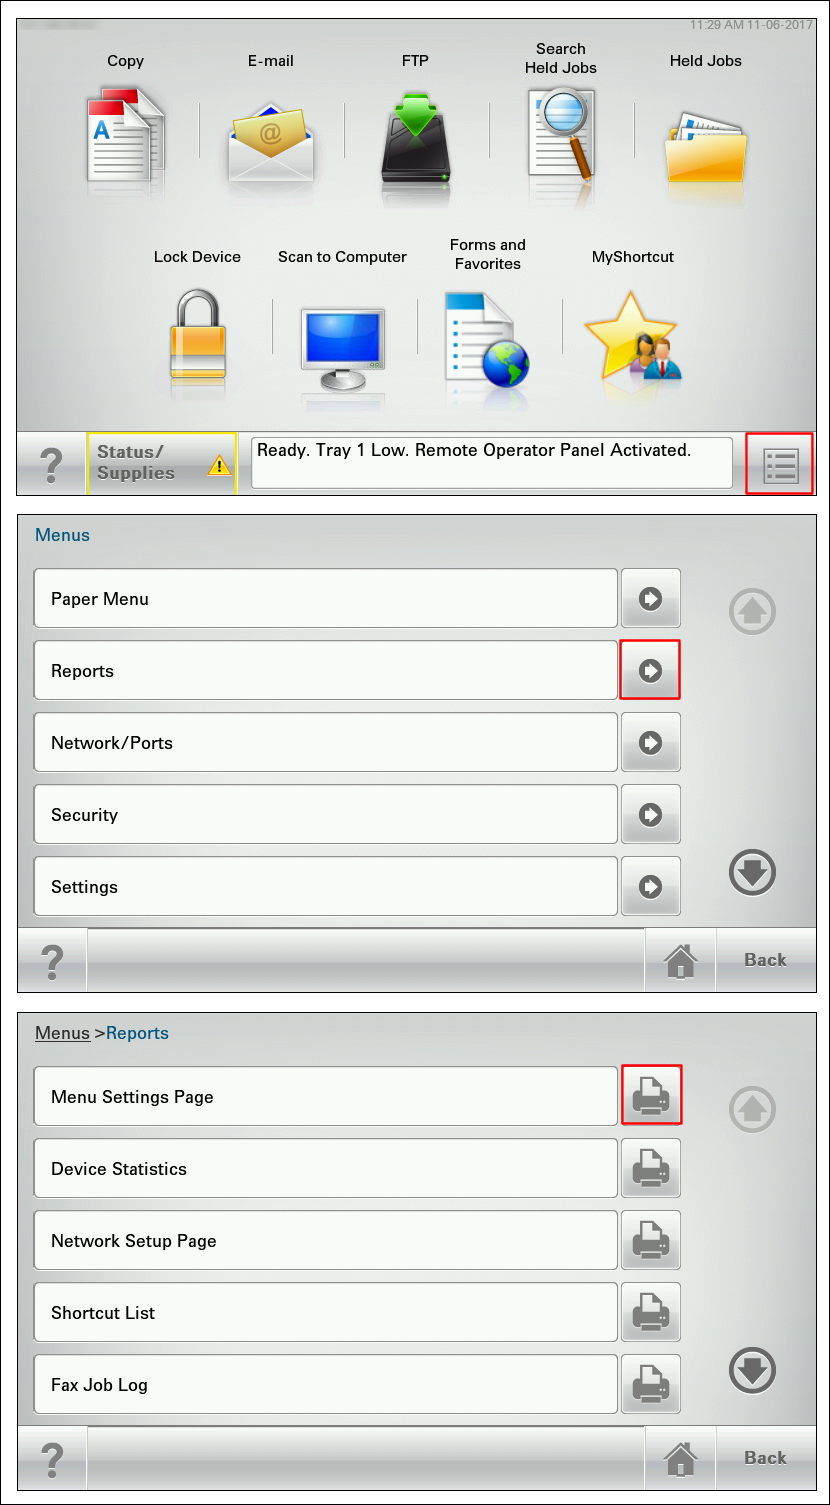
For wireless models, confirm the printer’s Wi-Fi indicator is lit and stable. Reconnect the device to your network if signal strength is weak. Print a network configuration page from the printer menu to confirm it has a valid IP address. This page serves as a diagnostic tool for network-related issues.
Assign a Static IP Address
Dynamic IP changes can break scanner recognition over time. To prevent this issue, access the printer’s Embedded Web Server by entering its IP address into a web browser. Navigate to Network, then TCP/IP Settings. Change the IP assignment from DHCP to Static. Enter a reserved IP address within your router’s range, then save and restart the printer. This ensures consistent network communication for scanning functionality.
Restart Devices and Services
Reboot Printer and Computer
A full restart clears temporary glitches that can cause scanner detection issues. Turn off the Lexmark device and unplug it from power for 30 seconds. Restart your computer, then power the printer back on and wait for it to fully boot. This simple step resolves many cases where the scanner disappears after sleep or update cycles.
Start Essential Windows Scanning Services
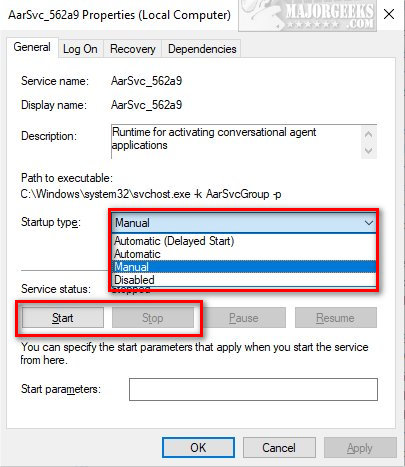
Scanning relies on specific background services in Windows. If these services are stopped, your scanner won’t work regardless of other configurations. The required services include Windows Image Acquisition (WIA), Function Discovery Provider Host, SSDP Discovery, and UPnP Device Host.
To start these services, press Windows key + S, type services, and open Services as Administrator. Find each service listed above in the alphabetical list. If the status shows Stopped, click Start and set the Startup type to Automatic. Restart the computer after making these changes. Skipping this step often leads to failed scans even with correct drivers installed.
Reinstall Full Lexmark Driver Suite
Uninstall Existing Software
Generic or partial drivers can block scanning functionality. Go to Control Panel, then Programs and Features. Find all Lexmark entries, such as Lexmark MC2425 or your specific model. Uninstall each one completely, even if only printing is working. Using Lexmark’s official uninstall tool is recommended if available, as it removes hidden components that standard uninstallation might miss.
Download and Install Complete Driver Package
Visit support.lexmark.com and enter your exact model number, such as MC3426adw or MC2425. Select your operating system version and download the full driver package, not the basic or print-only version. Run the installer as Administrator and follow all prompts. Allow all components to install, especially scanner utilities like Scan Center. After installation completes, restart your computer to finalize the setup.
Enable Scanner on Printer Menu
Activate Scan-to-Computer Function
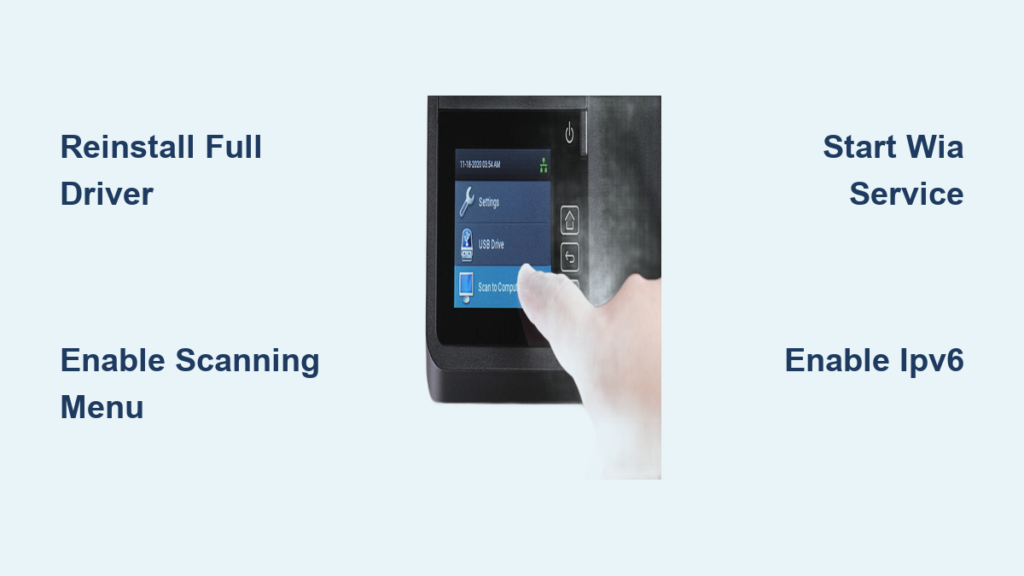
Many Lexmark models require manual activation of scanning via the printer’s display menu. A common mistake is forgetting to turn on scanning through the printer interface. On the printer’s control panel, tap Settings and navigate to Network/Scan Settings, then Scan to Computer. Ensure the option shows Enabled or On. Save the settings and power cycle the device to apply the changes.
If options vary by model, look for TWAIN, WIA, or Network Scan settings in the menu. Enable any scan-related network protocols that appear. This step activates the scanner function at the device level and is essential for computer-based scanning to work.
Update Firmware and Software
Check for Latest Firmware
Outdated firmware can break scanning after operating system updates. On Lexmark’s support site, go to Drivers and Downloads for your model. Under the Firmware section, check for newer versions. Download the update file and install it via USB drive, network using EWS, or the automated tool if included in the installer. Always update firmware after installing the latest driver for best compatibility.
Install Lexmark Utility Package
The Scan Center application is critical for many users and is included in the full software suite. It often works when the Windows Scan app fails. Scan Center supports TWAIN and WIA protocols directly. If not installed, re-run the full driver installer and choose Custom Install. Ensure Scan Center is selected during the installation process.
Configure TCP/IP and IPv6 Settings
Enable IPv6 on Network Adapter
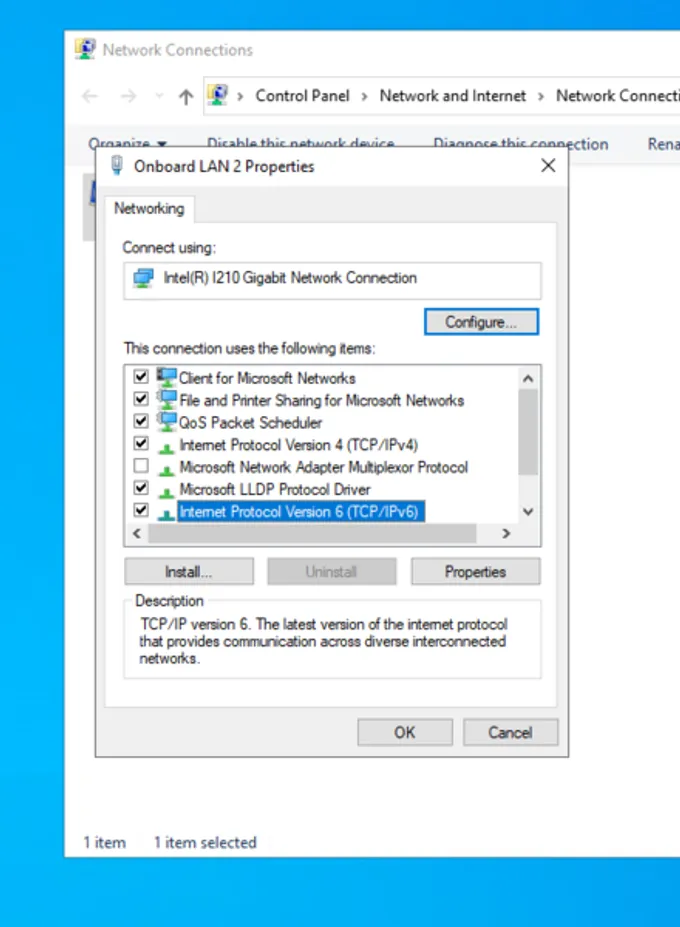
Lexmark wireless scanners often require IPv6 for bidirectional communication. Go to Control Panel, then Network and Sharing Center, and click Change adapter settings. Right-click your active network connection and select Properties. Check the box for Internet Protocol Version 6 (TCP/IPv6) and click OK. Many users have confirmed that after enabling IPv6, their Lexmark scanner reappeared in Windows Scan.
Verify Correct TCP/IP Port
Incorrect ports block scanning functionality. Open Devices and Printers, then right-click your Lexmark printer and select Printer Properties. Go to the Ports tab and ensure the selected port matches the printer’s current IP address. If unsure, create a new Standard TCP/IP Port using the printer’s IP. This stabilizes network scanning and prevents communication failures.
Test Scanning with Built-In Tools
Use Windows Fax and Scan App
After completing the setup steps, test scanning using Windows built-in tools. Open Windows Search, type Scan, and open the Scan app. Click Scan and if your Lexmark device appears, select it and test the functionality. If it doesn’t appear, click Add a device and choose Network scanner or TWAIN device. Manually enter the printer’s IP address if prompted.
Try Image Capture on Mac
For Mac users, open Applications and select Image Capture. Choose your Lexmark device from the sidebar. Click the reset button, which looks like a circular arrow, to refresh the connection. Try scanning again. If the device isn’t listed, add the printer via IP address in Printers and Scanners settings and ensure Bonjour is enabled on your network.
Run OS Troubleshooters
Use Windows Printer Troubleshooter
Windows can detect and fix common issues automatically. Go to Settings, then Update and Security, and select Troubleshoot. Choose Printer under Additional troubleshooters and run the tool. Apply any recommended fixes that the troubleshooter suggests. This may restart services, repair driver conflicts, or reset network printer connections.
Perform Clean Boot
Third-party software can interfere with scanning functionality. Press Windows key + R, type msconfig, and press Enter. Under Services, check Hide all Microsoft services and click Disable all. Go to Startup, click Open Task Manager, and disable all startup items. Restart the computer and test scanning. If it works, re-enable services gradually to identify the culprit software.
Model-Specific Fixes
Fix Lexmark MC2425 Scanning Issues
Users report that the printer works but the scanner is unavailable in scan profiles. Reinstall the full driver suite, not just the printer driver. Enable Scan to Computer in the printer menu. Update firmware to the latest version. Consult the Sending scanned documents to a computer guide for your specific model for detailed setup instructions.
Resolve MC3426adw App Compatibility
Scanning may work in Scan Center but not in the Windows Scan app. This occurs because Microsoft apps require proper WIA registration and IPv6 support. Ensure the WIA service is running. Reinstall the full driver package. In the Windows Scan app, manually add the scanner via Network TWAIN. Confirm IPv6 is enabled on both your PC and the printer. Scan Center remains a reliable workaround when OS apps fail.
Alternative Scanning Methods
Scan Directly to Email or USB
If computer scanning fails, use the printer’s built-in options. On the printer, select Scan and choose Scan to Email. Alternatively, insert a USB drive and select Scan to USB. This confirms the scanner hardware is functional and points to software or configuration issues rather than hardware failure.
Connect via USB Temporarily
To test whether the issue is network-related, disconnect Wi-Fi and connect the printer to your PC via USB. Reinstall drivers if needed and test scanning. If USB works, focus on TCP/IP, IPv6, or firewall settings for the network configuration fix.
Contact Lexmark Support
When to Escalate
Seek professional help if the scanner is still not detected after completing all troubleshooting steps. Also contact support if firmware update fails or Scan Center doesn’t open. Provide the full model number, operating system version, current firmware version, and a list of steps already attempted. Request a remote diagnostic session, latest utility or beta driver, or firmware update assistance.
Report Missing Support Pages
If you encounter page not found errors on Lexmark support sites, email XDPubsHelp@lexmark.com with the broken URL. Check the Contact Us page for alternative support channels if needed.
Frequently Asked Questions About Lexmark Scanner Not Working
Why does my Lexmark printer work but the scanner doesn’t?
This typically occurs because the full driver suite isn’t installed. Printing only requires basic drivers, while scanning needs additional components like Scan Center and WIA support. Reinstall the complete Lexmark driver package to resolve this issue.
How do I enable scanning on my Lexmark printer?
Access the printer’s control panel and navigate to Settings, then Network/Scan Settings. Find Scan to Computer or Network Scan and enable it. Save the settings and power cycle the device. This step is required for computer-based scanning to function.
Why does my scanner disappear from Windows after working before?
This often happens after Windows updates change network protocols or services. Check that WIA and related services are running. Verify IPv6 is enabled on your network adapter. Reinstall the full driver suite if needed.
Does IPv6 need to be enabled for Lexmark scanning?
Yes, for wireless Lexmark MFPs, IPv6 must be enabled on both the printer and your computer for full bidirectional communication. Many users have resolved scanning issues by enabling IPv6 in their network adapter properties.
What should I do if Scan Center works but Windows Scan app doesn’t?
This indicates the scanner hardware is functional but Microsoft app registration is incomplete. Ensure WIA service is running. Reinstall the full driver package. Manually add the scanner in Windows apps using the Network TWAIN option. Scan Center is a reliable alternative for scanning.
Key Takeaways for Fixing Your Lexmark Scanner
Lexmark scanner issues are typically software or configuration-based rather than hardware failures. Installing the full driver suite, not just basic printer drivers, is the most critical step. Enable scanning through the printer menu and ensure WIA and related Windows services are running. Update firmware after driver installation for best compatibility. For wireless models, verify TCP/IP and IPv6 settings are correct. Use Scan Center as a reliable fallback when Windows apps fail. With these steps, most users restore scanning functionality in under 30 minutes.