If you have just purchased an Autel scanner like the MS908S Pro, MK808BT, or IM608, you are holding one of the most powerful diagnostic tools available. However, without proper setup and knowledge, even the most advanced scanner becomes underutilized. This guide walks you through every critical step from initial registration to advanced diagnostics, ADAS calibration, and module programming.
You will learn how to connect the scanner correctly, identify vehicles accurately, interpret diagnostic trouble codes, run live data tests, perform special service functions, and leverage built-in tools like the oscilloscope and Remote Expert. Whether you are a professional technician or a skilled DIYer, this guide ensures you get the most from your Autel scanner.
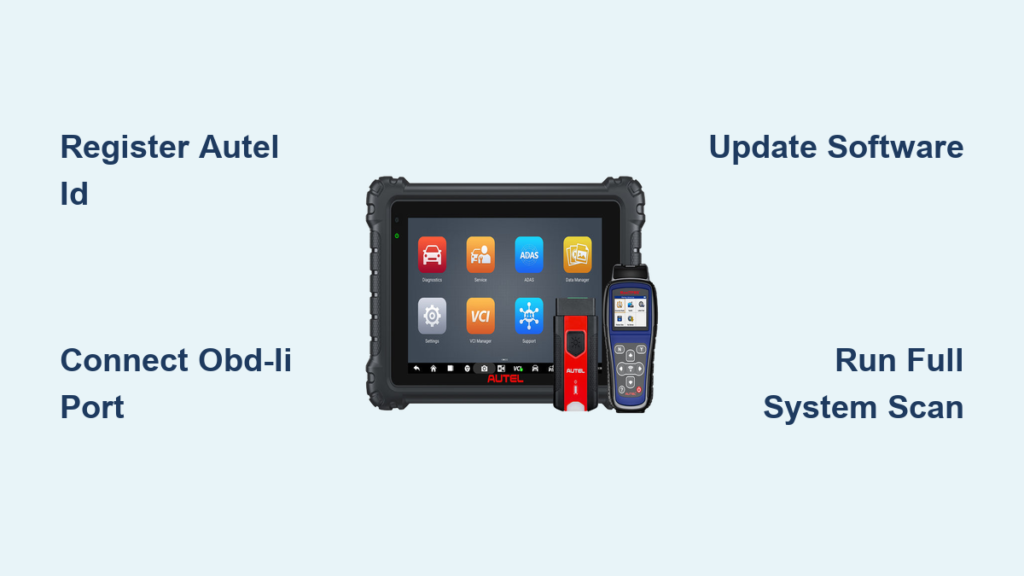
Register Your Autel ID and Activate the Device
Before your scanner operates at full capacity, you must register it with Autel. Without registration, key features like software updates, Remote Expert, and Motor True Speed remain locked and inaccessible.
Create Your Autel Account
Navigate to the Autel official website and create a free Autel ID using your email address. Log in to your account and register your device by entering the serial number found on the scanner or packaging. Confirm the activation on the scanner itself by going to System Settings and selecting Account to complete the verification process.
Unlock Cloud Features
Once registered, you gain access to essential cloud-based services. Enable OTA over-the-air software updates to keep your scanner compatible with new vehicle models. Activate Remote Expert for live support from automotive specialists. Access Motor True Speed for wiring diagrams, TSBs, and repair procedures. Note that scanners purchased between November 1 and December 31, 2024, include one year of free Motor True Speed access.
Connect to Wi-Fi and Update Software
A connected scanner is a powerful scanner. Keeping your device updated ensures maximum vehicle coverage and prevents compatibility issues with newer models.
Set Up Wi-Fi Connection
Go to Settings on your scanner and select Wi-Fi. Choose a 2.4 GHz network from the available options, as 5 GHz networks are not supported. Enter your password carefully and verify the connection status shows as connected. Remember that Remote Expert requires a wired Ethernet connection, not Wi-Fi, when you need live expert assistance.
Enable Auto Updates
Access System Settings and select Auto Update to configure automatic downloads. Schedule updates for off-hours such as midnight to 1 AM to avoid disrupting your workflow. Alternatively, manually check for updates through the Autel Update Client on your PC. Check for updates monthly, especially before working on newer model-year vehicles.
Plug Into the OBD-II Port Correctly

The physical connection to the vehicle is your gateway to all diagnostic data. A secure connection prevents communication errors and ensures accurate readings.
Locate and Access the DLC Port
Find the 16-pin OBD-II port, also known as the Data Link Connector, under the dashboard near the driver side. Common locations include below the steering column or on the lower left of the instrument panel. The port is typically trapezoidal in shape and may have a cover that flips open.
Make a Secure Connection
Insert the OBD-II cable firmly into the port until it clicks into place and feels secure. For Bluetooth-equipped models, plug the adapter into the OBD-II port first, then pair it with the scanner through wireless settings. If communication fails, inspect the port for bent pins, corrosion, or debris, and test with another tool to confirm port functionality.
Power the Vehicle Correctly
Even with a perfect connection, insufficient power can kill diagnostics or cause communication failures. Proper power management protects both the vehicle and your scanner.
Set Ignition to the Correct Position
Turn the vehicle ignition to the ON position. The engine may remain off unless you are performing live testing under load. Some systems, particularly ADAS and ABS modules, require ignition ON to wake up and communicate properly with the scanner.
Maintain Proper Battery Voltage
Ensure the vehicle battery stays above 12.4V throughout diagnostics. Use a battery maintainer or charger during extended procedures such as ECU flashing or ADAS calibration. Critical voltage drops below 12.0V risk communication failure or permanent ECU damage, so monitor this closely during complex procedures.
Identify the Vehicle Accurately
Selecting the correct vehicle profile is essential. Wrong vehicle identification produces incorrect data and can lead to misdiagnosis or failed service functions.
Use Auto Detect for Fast Identification
Tap Auto Detect on your scanner to automatically read the VIN via the OBD-II interface. This method works efficiently on most 1996 and newer gasoline vehicles and 1997 and newer diesel vehicles. Auto Detect may fail on pre-2000 models, vehicles with aftermarket ECUs, or those experiencing communication issues.
Enter Vehicle Information Manually
If Auto Detect fails, tap Manual Entry and input the year, make, model, engine size, and transmission type. This method is required for pre-OBD2 vehicles, vehicles with damaged ECUs, or aftermarket engine swaps. Take care to enter accurate information to ensure proper diagnostics.
Input RPO Codes for GM Vehicles
When prompted on GM vehicles, access the RPO input option. Enter the codes found on the glove box label or door jamb sticker. Incorrect RPOs can cause false DTCs or failed service functions, so verify these codes carefully before proceeding.
Save Frequent Vehicles to Favorites
Tap the Favorites button to save vehicles you scan regularly for quick access later. Use the search icon to find specific models like Ford F-150 or BMW X5 rapidly. Filter results by region using America, Europe, or Asia options to narrow your search.
Run a Pre-Scan Before Repairs
Never skip the pre-scan, especially in collision or ADAS-related work. This step establishes a baseline and reveals existing faults that could affect your repair outcomes.
Why Pre-Scan Matters
The pre-scan reveals both active and stored DTCs, detects ADAS module faults, and establishes a baseline before any repair begins. For collision shops, performing a pre-scan is critical for liability protection, as missing hidden faults can lead to safety issues and expensive comebacks.
Prepare the Vehicle Properly
Park the vehicle on level ground and inflate tires to specification. Clean all sensors and the windshield to ensure accurate readings. Note any customer complaints before beginning your diagnostic process.
Perform Full System Scan and Read DTCs
With the vehicle identified, scan all modules to get a complete picture of the vehicle health. This comprehensive scan reveals communication status across all control units.
Initiate System-Wide Scan
Tap Full System Scan to have the scanner poll all ECUs including the PCM, ABS, TCM, SRS, and ADAS modules. Wait for completion, which typically takes under 2 minutes on older vehicles and 3 to 8 minutes on newer vehicles with 50 or more modules. Do not interrupt the scan, as this can corrupt data.
View the Topology Screen
The topology screen displays a visual map of all control modules with color-coded status indicators. Green indicates normal operation, yellow-brown shows stored codes, and red signals communication failure or hard faults. Tap any module to view its specific DTCs and access detailed diagnostics.
Understand and Clear DTCs
Diagnostic trouble codes serve as your roadmap to the problem. Active codes trigger the CEL and indicate current faults, while pending codes may become active if the fault repeats. History codes represent previously cleared issues, and permanent codes in Mode 10 require multiple drive cycles to clear. After repairing the root cause, clear codes through the Read/Reset Codes function and verify the CEL does not return within 1 to 2 drive cycles.
Analyze Live Data and Graphs

Live data lets you see what the vehicle is experiencing in real time, similar to watching the car think through its sensors and modules.
Access Live Data Streams
Select Live Data or Data Stream after choosing your target system such as Engine, Transmission, or ABS. Choose from display modes including numerical values for raw data, analog gauges for visual trends, time-based graphs for pattern recognition, and bar graphs for amplitude comparison.
Graph Multiple Parameters
Select up to four PIDs simultaneously for side-by-side analysis. Customize the X-axis for time base and adjust the Y-axis for amplitude scaling per channel. Use the Record Movie function to capture data sessions, and press Flag when symptoms occur to mark those moments for later review.
Master the Six Core PIDs
Focus on these six parameters to solve most driveability issues. Engine temperature affects fuel trims, timing, and emissions. Pre and post-catalyst O2 sensors reveal fuel mixture and converter efficiency. MAF and MAP sensors indicate airflow and reveal leaks or restrictions. Throttle position sensor should mirror MAF response, with lag suggesting binding. RPM signal validates engine speed and fuel pump activation. Fuel trims show short-term and long-term adjustments, with positive values above 10% indicating low fuel pressure or dirty injectors, while consistently negative values suggest vacuum leaks.
Run Active Tests and Special Functions
Active tests allow bidirectional control, letting you command components directly to test their function rather than just reading data.
Perform Active Tests
Navigate to Special Test or Active Tests to access component tests. Common tests include cooling fan relay on-off cycles, evap purge solenoid duty cycles from 5% to 25%, individual fuel injector cycling, throttle actuator open-close tests, ABS motor pump runs, and transmission solenoid gear shifts. Ensure ignition is ON, battery voltage exceeds 12.4V, and the engine is at operating temperature when required.
Use Special Service Functions
After repairs, certain systems require recalibration or reset. Access these through the Service button. Common functions include TPMS relearn for tire sensors, EPB reset for caliper retraction during brake work on VW and BMW vehicles, SAS calibration after alignment, DPF regeneration for diesel filters, ABS bleeding sequences, battery registration for new AGM or EFB batteries, and throttle body adaptation for idle position relearning.
Use Advanced Features: Oscilloscope, ADAS, and Remote Expert
Beyond basic diagnostics, your Autel scanner includes advanced capabilities for complex troubleshooting and programming.
Access the Built-In Oscilloscope
On MS Series models like the MS908S Pro, IM608, and Ultra, tap Scope or use the dedicated button to enter oscilloscope mode. Use the Car button for guided setup based on your vehicle type. Compare live signals to the built-in waveform library for ignition, injectors, CAN bus, and sensors. Analyze key waveforms including spark lines showing horizontal for normal operation, downward slope for rich conditions, upward slope for lean conditions, and sharp drops indicating compression loss.
Calibrate ADAS Systems
After windshield replacement, front bumper repair, airbag deployment, or suspension work, ADAS calibration becomes necessary. Required systems include adaptive cruise control, automatic emergency braking, lane departure warning, blind spot detection, and forward-facing cameras. Ensure the vehicle is on level ground with correct tire pressure and clean sensors. Use OEM-compliant targets and verify calibration by running a full system scan to confirm all ADAS modules report Ready status.
Leverage Remote Expert and Motor True Speed
When facing complex issues, access Remote Expert through a wired Ethernet connection to share live data with real automotive experts. Motor True Speed provides wiring diagrams, TSBs, repair procedures, and test strategies. If purchased between November 1 and December 31, 2024, you receive free access for one year.
Maintain Your Scanner Long-Term
Regular maintenance keeps your diagnostic tool performing like new and extends its useful life.
Update Software Regularly
Check for updates monthly via Wi-Fi or the Autel Update Client on PC. Update before working on new model-year vehicles to ensure compatibility and access the latest diagnostic features.
Care for Your Device
Store the scanner in a protective case when not in use. Avoid exposing it to extreme heat or cold. Clean the screen with a microfiber cloth and replace the stylus tip when worn. The standard warranty covers 12 months, with extended options available through Autel.
Key Takeaways for Mastering Your Autel Scanner
Following these core practices ensures you get maximum value from your Autel scanner. Register your Autel ID immediately to unlock all features. Update software monthly for new vehicle coverage. Connect securely to the OBD-II port with ignition ON and verify vehicle identification using VIN or manual entry. Perform pre and post-scans for ADAS and collision work. Maintain battery voltage above 12.4V during diagnostics. Master the six core PIDs for driveability issues and use Mode 6 and Mode 10 for deeper analysis. Leverage Motor True Speed for wiring diagrams and TSBs, and utilize Remote Expert for complex programming challenges. Respect OEM security protocols, as some functions require dealer access. By applying these principles, you will diagnose faster, repair confidently, and deliver professional results consistently.
Frequently Asked Questions About Using Autel Scanners
Can I use an Autel scanner without registering it?
You can perform basic OBD-II diagnostics without registration, but key features remain locked. Software updates, Remote Expert support, and Motor True Speed access require an active Autel ID registration.
Why is my Autel scanner not connecting to the vehicle?
First, verify the OBD-II cable is firmly inserted and the ignition is in the ON position. Check for bent pins or debris in the port. Ensure battery voltage stays above 12.4V. If issues persist, test the port with another scan tool to confirm functionality.
Do I need Wi-Fi to use my Autel scanner?
Wi-Fi is optional for basic diagnostics but required for OTA software updates. Note that Remote Expert live support specifically requires a wired Ethernet connection, not Wi-Fi.
Can an Autel scanner program all vehicle keys and immobilizers?
Autel supports many immobilizer systems including Ford PATS, Mazda IMMO, Toyota, Honda, BMW, and VW MQB. However, some systems require dealer-generated codes such as the 4-digit IN Code for certain Mazda vehicles, which Autel cannot generate.
How often should I update my Autel scanner software?
Check for updates monthly at minimum. Update before working on newer model-year vehicles to ensure proper communication and diagnostic capability. Set up Auto Update to automate this process during off-hours.