A dirty scanner glass is one of the most common causes of poor scan quality. Whether you’re digitizing photos, scanning documents, or archiving film, how to clean scanner glass correctly can make the difference between blurry, streaked output and crisp, professional results. Dust, fingerprints, toner residue, and paper fibers accumulate quickly, and even microscopic debris creates visible defects at high resolutions.
This guide walks you through every step, from basic surface wipes to deep cleaning internal components, using only safe materials and proven methods. You’ll learn what tools to use, what to avoid, and how often to clean based on manufacturer-approved practices.
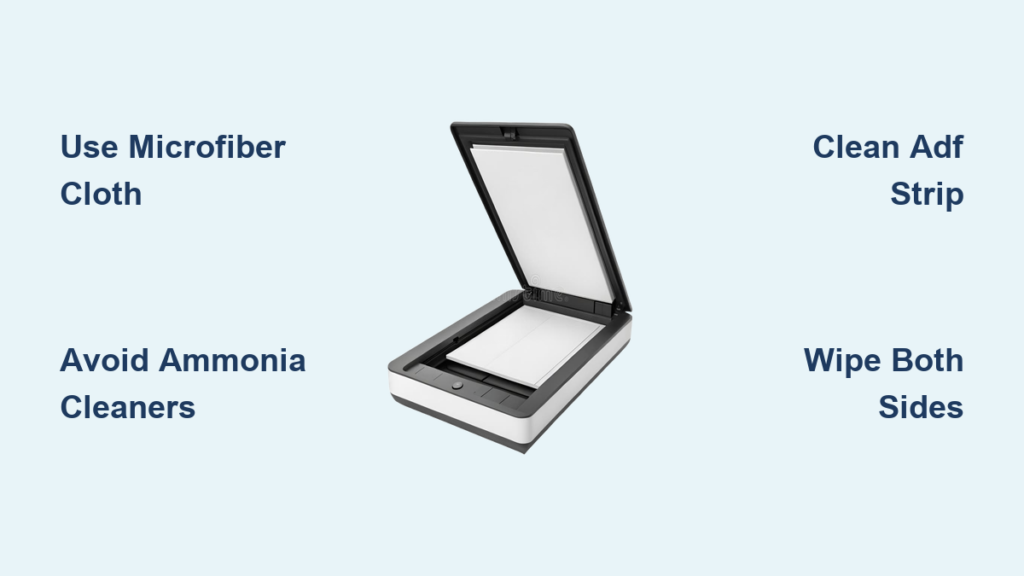
Gather the Right Cleaning Supplies for Scanner Glass
Using improper cloths or cleaners can scratch the glass or damage optical coatings. Always choose non-abrasive, residue-free supplies.
You will need these essential tools:
- Lint-free microfiber cloth – Your primary tool. Never use paper towels, tissues, or rough fabrics
- Ammonia-free glass cleaner – Safe for coated surfaces. Avoid Windex Original and other ammonia-based formulas
- Distilled water – Prevents mineral spots. Ideal for sensitive optics or when mixing mild soap solutions
- 70% isopropyl alcohol – For sticky residues. Apply sparingly with a cotton swab or cloth
- Cotton swabs – For edges, sensors, and tight spaces
Pro Tip: Keep a dedicated microfiber cloth for scanner cleaning. Wash it regularly to remove embedded grit that could scratch the glass.
Safely Clean Scanner Glass Without Damaging Optics

Safety is critical before any cleaning. Always disconnect the scanner to prevent electrical hazards and ensure moving parts remain still.
Follow these safety steps:
- Power off and unplug the scanner – Never clean a powered-on device
- Open the scanner lid fully – Expose the full glass surface
- Never spray liquids directly on glass – Apply cleaner to the cloth instead
- Use a damp, not soaked, cloth – Excess liquid can seep into electronics
Critical Rule: Liquids can seep into electronics, causing corrosion or short circuits. Always apply cleaner to the cloth, not the scanner glass.
Remove Stubborn Streaks and Spots From Flatbed Scanners
Surface cleaning resolves most scan artifacts. Follow these steps for best results.
Wipe Away Loose Dust First
Start with a dry lint-free cloth to remove loose particles. Use straight, overlapping strokes from one edge to the other. Never use circular motions, which create swirl marks.
Visual Cue: Shine a flashlight across the glass at an angle. Dust and smudges become instantly visible.
Apply Cleaner to the Cloth
Spray a small amount of ammonia-free cleaner or distilled water onto the cloth. Gently wipe the glass using long, even passes. Wipe both the top surface and the area around it.
Dry Immediately
After wiping, use a second dry microfiber cloth to remove moisture. Letting liquid sit increases the risk of seepage into the device.
Test Scan With Blank Paper
Run a test scan of a blank white sheet at 300 dpi. Look for streaks, shadows, or repeating lines. If defects persist, repeat the process or proceed to deeper cleaning.
Clean the ADF Glass Strip to Stop Repeating Lines
In multifunction printers, a narrow glass strip inside the document feeder scans pages as they pass through. Toner and paper dust here cause horizontal streaks that repeat on every page.
Locate the ADF Scanning Strip
Open the ADF cover or access panel. The glass strip runs along the paper path where documents are scanned.
Clean the Strip Properly
- Power off and unplug the device
- Open the ADF cover or access panel
- Dampen a microfiber cloth with distilled water or ammonia-free cleaner
- Wipe the glass strip with straight strokes
- Dry thoroughly with a clean cloth
Critical: Neglecting the ADF glass is a leading cause of poor automated scan quality, even when the main glass looks clean.
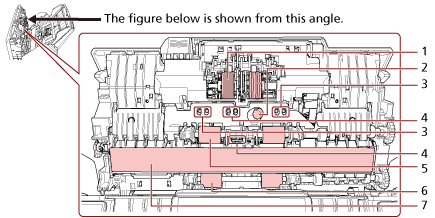
Deep Clean Scanner Glass by Removing the Panel
If surface cleaning doesn’t fix scan artifacts, contamination may be under the glass or on the bed beneath it. This is common in flatbed all-in-ones from HP, Epson, Canon, and dual-scan models.
When Glass Removal Is Necessary
Remove the glass if you see persistent spots or lines after thorough surface cleaning. Dust accumulates on the underside and causes “floating specks” in scans.
Disassemble Safely
- Open the scanner lid fully
- Locate screws around the glass frame, usually Phillips head
- Remove screws and set them aside in a labeled container
- Gently release clips using a flat-head screwdriver or plastic opening tool
- Lift the glass carefully. Do not twist or flex it
Warning: Some models use adhesive strips or alignment pins. Refer to your user manual before disassembly.
Clean Both Sides Thoroughly
Wipe the underside of the glass thoroughly. This is where dust accumulates and causes image defects. Clean the scanner bed underneath to remove trapped particles. Use a cotton swab for edges and corners.
Reassemble and Test
- Realign the glass precisely
- Reattach frame and clips
- Tighten screws gently
- Close the lid and reconnect power
- Run a high-resolution test scan
Maintain Sheet-Fed and CIS Scanners Properly
Portable scanners like Fujitsu ScanSnap models use Contact Image Sensors instead of mirrors and lamps. Cleaning focuses on rollers, sensors, and the narrow scanning strip.
Open the Paper Path
Use release tabs to open the feed mechanism. Avoid forcing any parts, as they are fragile.
Clean Rollers and CIS Strip
- Wipe rollers with a dry microfiber cloth
- For residue, use a cotton swab lightly moistened with distilled water or 70% isopropyl alcohol
- Gently wipe the CIS strip with a lint-free cloth
- Apply cleaner to the cloth only, never directly on sensors
Expert Note: Avoid pressure that could deform rollers. deformed rollers cause paper jams and misfeeds.
Use Cleaning Sheets
Pre-moistened scanner cleaning sheets can be fed through the machine to clean rollers and sensors automatically. This is an effective maintenance method for frequent use.
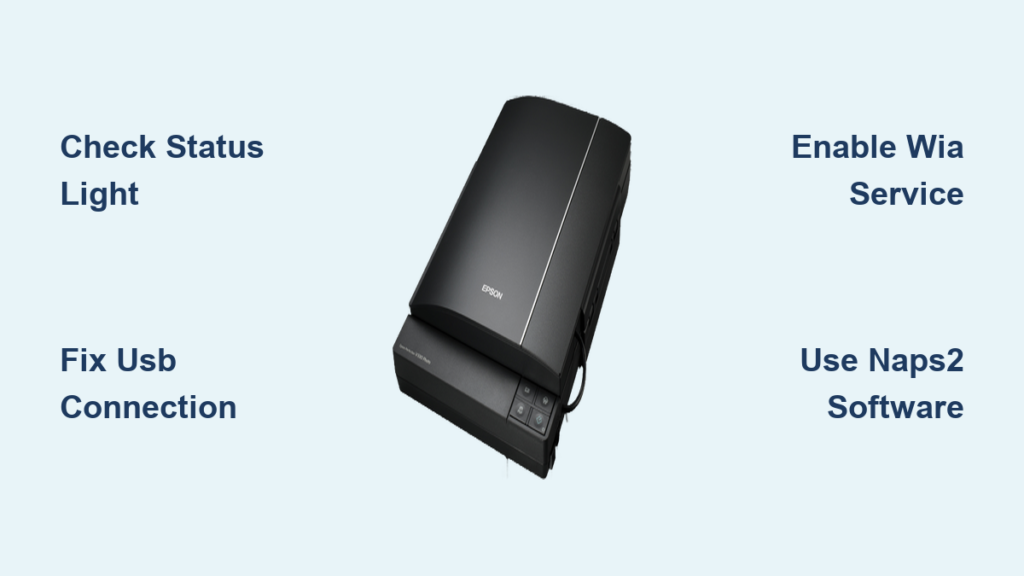
Clean High-End Scanners Like Epson V-Series

Models like the Epson V850 Pro, V700, V750, and V800 support both reflective and transmissive scanning for film and negatives. Both glass surfaces impact image quality.
Clean Top and Bottom Glass
- Top glass – Standard flatbed cleaning method
- Bottom glass – Located under the scanning bed. Requires partial disassembly
Dust on the underside causes persistent spots in film scans. This is especially problematic when scanning at high resolutions.
Follow Service Manual Procedures
- Consult official documentation before disassembling
- Use only non-abrasive, ammonia-free cleaners
- Avoid solvents that degrade anti-reflective coatings
Schedule Regular Maintenance
With heavy use, clean the underside every 3 to 6 months. Clean immediately after scanning damaged or sticky negatives, as emulsion residue builds up quickly.
Avoid These Common Cleaning Mistakes
Using the wrong methods causes more damage than good. Steer clear of these dangerous approaches.
Never Use Ammonia-Based Cleaners
Ammonia degrades optical coatings and damages plastic seals. Windex Original and similar products will harm your scanner.
Never Use Abrasive Cloths
Paper towels, tissues, and rough fabrics cause micro-scratches and leave lint. These create permanent image defects.
Never Spray Liquid Directly
Spraying cleaner on the glass leads to seepage into electronics, causing corrosion and short circuits.
Never Use Compressed Air
Canned air introduces moisture and propellant that can damage circuits. Use a blower bulb in a clean environment instead.
Warranty Note: Most manufacturers allow user cleaning, but damage from improper methods is not covered by warranty.
Set Up a Scanner Maintenance Schedule
Cleaning frequency depends on how often you use your scanner and what types of materials you scan.
| Usage Level | Cleaning Frequency | Components to Clean |
|---|---|---|
| Heavy use (office, digitization) | Every 2 to 4 weeks | Main glass, ADF strip, rollers, sensors |
| Moderate use (home office) | Monthly | Main glass, ADF glass |
| Light use | Every 3 to 6 months | Full preventive maintenance |
| After scanning dirty media | Immediately | All contact surfaces |
Immediate cleaning required after scanning pencil-marked paper, toner-covered prints, inkjet photos, or emulsion-coated film.
Troubleshoot Persistent Scan Quality Issues
If cleaning doesn’t resolve problems, further investigation is needed.
Steps to Take When Cleaning Fails
- Reinspect all glass surfaces, including underside and ADF strip
- Check rollers and sensors for debris
- Ensure complete drying before reassembly
- Run calibration tools via scanner software
- Update firmware from the manufacturer
When to Seek Professional Help
Contact a professional if the glass is cracked or deeply scratched, the motor makes unusual noises, scans are misaligned or out of focus, or internal mirrors or sensors appear damaged.
Expert Note: Optical misalignment requires factory-level repair. DIY fixes may worsen the issue.
Frequently Asked Questions About Cleaning Scanner Glass
Can I use Windex to clean scanner glass?
No. Windex Original and other ammonia-based cleaners damage optical coatings and plastic seals. Use ammonia-free glass cleaner, distilled water, or eyeglass cleaner instead.
How often should I clean my scanner glass?
Frequency depends on usage. Heavy use warrants cleaning every 2 to 4 weeks. Moderate home office use needs monthly cleaning. Light use requires cleaning every 3 to 6 months.
Why do scans still show streaks after cleaning?
Streaks often come from the ADF glass strip, not the main flatbed glass. Clean the document feeder strip specifically. If streaks persist, check for internal contamination requiring glass removal.
Is it safe to remove the scanner glass for cleaning?
Yes, when done carefully. Always unplug the scanner first. Follow your user manual for specific instructions. Handle glass gently to avoid cracking. Label screws during removal.
What causes repeating lines in scanned documents?
Repeating horizontal lines typically indicate debris on the ADF glass strip. This narrow surface scans documents as they pass through. Cleaning it resolves the issue in most cases.
Key Takeaways for Cleaning Scanner Glass
A clean scanner glass can improve image resolution accuracy by up to 30% in high-DPI scanning. Particles as small as 10 to 20 microns create visible artifacts at high resolutions, making regular cleaning essential for professional results.
The most important steps are using lint-free microfiber cloths, applying cleaner to the cloth rather than the glass, and cleaning both the main flatbed and ADF strip. For dual-scan models like Epson V-series, clean both top and bottom glass surfaces. Avoid ammonia-based cleaners, abrasive cloths, and spraying liquids directly on the scanner.
Stick to a regular maintenance schedule based on your usage level. Clean immediately after scanning dirty media like pencil-marked paper or toner-covered prints. With proper care, your scanner will deliver sharp, accurate scans for years.