You’ve just scanned a document, but instead of saving it to a folder or transferring it manually, you want it sent directly to your inbox. That’s where scan to email comes in. This feature, available on most multifunction printers and networked scanners, lets you digitize and share documents in seconds right from the device’s control panel. Whether you’re in an office aiming for a paperless workflow or working remotely and need to send a contract quickly, setting up scanner to email saves time and streamlines communication.
But getting it to work isn’t always plug-and-play, especially with modern email systems like Microsoft 365 or Gmail, which now enforce stricter security rules. Misconfigured SMTP settings, outdated firmware, or missing app passwords can all block your scans from sending. This guide walks you through the complete setup process, from basic configuration to solving common failures.
Configure SMTP Email Settings for Scanner to Email
To enable scan to email, your scanner must connect to an email server using SMTP (Simple Mail Transfer Protocol). This requires accurate server settings and authentication.
Enter Correct SMTP Server Details
Navigate to your printer’s web interface or settings menu and locate Email or SMTP Settings. Input the following based on your email provider:
• Gmail: smtp.gmail.com, Port 587, STARTTLS
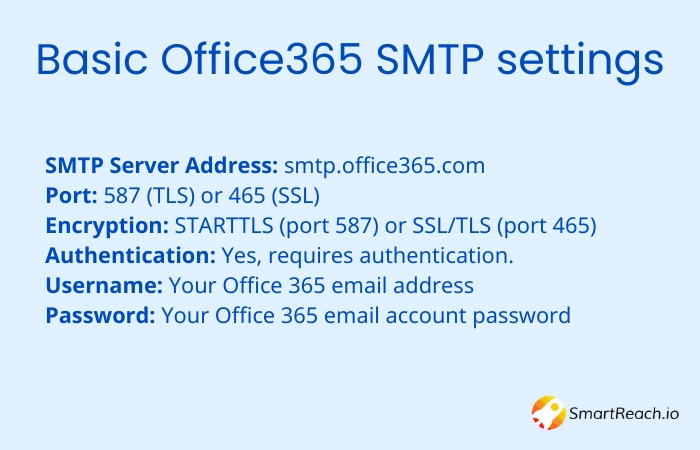
• Microsoft 365: smtp.office365.com, Port 587, STARTTLS
• iCloud: smtp.mail.me.com, Port 587, STARTTLS
• Yahoo (legacy): smtp.mail.yahoo.com, Port 587, STARTTLS
A common typo, using “smpt” instead of “smtp,” will break connectivity. Always double-check spelling when entering server addresses.
Enable Authentication and Encryption
Ensure these options are enabled in your scanner settings:
• SMTP Authentication: Turn on
• Username: Enter your full email address
• Password: Use your account password or app-specific password if MFA is enabled
• Secure Connection: Enable STARTTLS (port 587) or SSL/TLS (port 465)
• Validate Certificates: Disable unless you’ve imported a trusted certificate
Older devices may not support TLS 1.2, which is required for Microsoft 365. If scans fail, confirm your scanner firmware supports modern encryption standards.
Set Up Scanner to Email with Microsoft 365
Microsoft 365 no longer allows basic username/password authentication by default, making direct scanner integration more complex. Follow these steps for reliable scanner to email functionality.
Assign a Valid License
A Microsoft 365 license (E3/E5 or equivalent) must be assigned to the mailbox used for scanning. Unlicensed mailboxes cannot send email, even with correct credentials. Create a dedicated scanning mailbox and assign it a license to avoid conflicts with user accounts.
Use App Passwords for MFA
If multi-factor authentication is enabled on your scanning account, you cannot use your regular password. Generate an app password instead:
- Go to Microsoft 365 Admin Center
- Navigate to Users and select Active Users
- Enable MFA for the scanning account
- Generate an app password under security settings
- Use this 16-digit password in your scanner’s SMTP configuration
App passwords only work with MFA-enabled accounts. They cannot bypass modern authentication requirements on basic auth accounts.
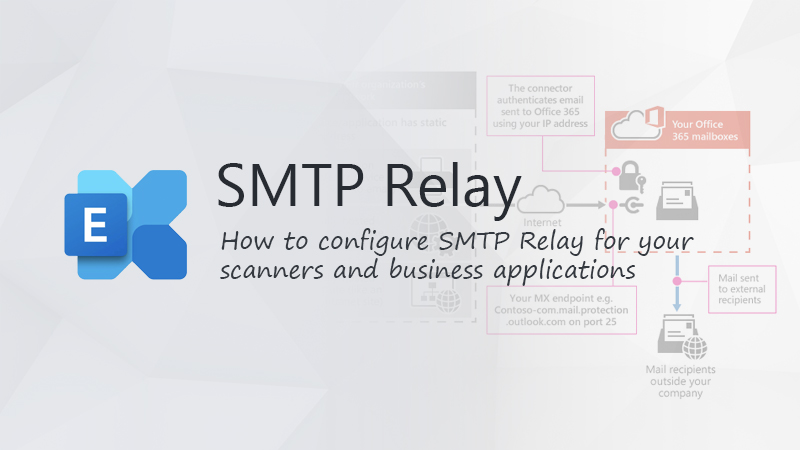
Use SMTP Relay (Recommended Alternative)
Microsoft recommends SMTP relay via connector instead of device-level authentication. This method avoids the need for app passwords and works reliably with modern security policies.
To set up SMTP relay:
• Create a connector in Exchange Admin Center
• Specify your scanner’s static public IP address
• Update your domain’s SPF record to include the scanner’s IP address
• No authentication is needed at the device level
Set Up Scanner to Email with Gmail
Gmail requires app-specific passwords for scanner to email functionality. This applies even if you have a Google Workspace account.
Generate a Gmail App Password
- Go to myaccount.google.com and sign in
- Navigate to Security
- Enable 2-Step Verification
- Under App passwords, select Other (Custom name)
- Enter a label like “Scanner-Printer” and click Generate
- Copy the 16-digit app password
Configure Your Scanner
In your scanner’s SMTP settings:
• SMTP Server: smtp.gmail.com
• Port: 587
• Encryption: STARTTLS
• Authentication: Enabled
• Username: Your full Gmail address
• Password: The app password you just generated
If you see errors about less secure apps, this is expected. The app password method bypasses this restriction.
Set Up Scanner to Email on HP Printers
HP printers use the Embedded Web Server (EWS) for scanner to email configuration. This method works for most HP Color LaserJet Pro models.
Access the Embedded Web Server
- On the printer control panel, swipe down from the status center to view the IP address
- Open a web browser and enter the printer’s IP address
- Accept security warnings to proceed to the EWS
Configure Email Server Profile
- Navigate to General > Email Servers > Add (+)
- Choose Profile Type (User-defined for multiple servers or SMTP Server for single server)
- Enter the Display Name that will appear on the printer during scanning
- Enter your Email Address (sender address)
- Enter SMTP Server Name and Port (typically smtp.gmail.com or smtp.office365.com, port 587)
- Set Maximum Size to Unlimited
- Enable Always Use Secure Connection for encryption
- Disable Validate Certificates unless you’ve imported a certificate
Under Server Authentication:
• Select Server requires authentication
• Enter Username (full email) and Password (or app password)
Test the Configuration
- Check the box next to the new profile
- Click the Test icon and select Test
- A successful test sends a confirmation email to your address
Once configured, scanning to email becomes a one-touch operation from the printer’s control panel.
Set Up Scanner to Email on Canon ImageCLASS
Canon ImageCLASS printers require configuration through the Remote UI. This method applies to models like the MF628Cw and similar devices.
Access Remote UI
- Open a web browser and go to http://
/sendsupportlogin.html - Log in as System Manager using ID and PIN
- Click Send to E-Mail Settings
Configure Network and SMTP Settings
- Navigate to Settings and Registration > Preferences > Network Settings > Port Number Settings
- Change SMTP port from default (25) to 587
- Save changes
Enter Email Configuration
Go to Function Settings > TX Settings > Network Setting – E-Mail/I-Fax Settings and enter:
• SMTP Server Name: Your SMTP server (e.g., smtp.gmail.com)
• Email Address: Your full email address
• SMTP Authentication: ON
• User Name: Full email address
• Password: App-specific password if 2FA is enabled
• Use TLS for SMTP: Checked
Click Apply or Register, then restart the printer by powering off for 10 to 30 seconds before turning it back on.
If sender appears blank or emails go to spam, ensure the E-Mail Address is correctly set and go to Menu > Scan Settings > Register Unit Name (E-Mail/I-Fax) to assign a sender name.
Set Up Scanner to Email on Brother Devices
Brother devices offer Easy Scan to Email functionality with optional PIN protection for shared office printers.
Register an Email Account
- Ensure the Brother device is connected to the network
- From the control panel, scroll to Apps
- Select Easy Scan to Email
- Tap Edit Account > Register Account > OK
- Enter the Destination Email Address (can be a team or shared inbox)
- Enter a Display Name (e.g., Finance Team)
Optional: Set a PIN for security by choosing Yes and entering a 4-digit PIN.
Configure Scan Settings
Before saving, customize these options:
• File Type: PDF, JPEG, or TIFF
• Scanning Mode: Single-page or multi-page
• Color Mode: Color or black-and-white
• Resolution: 150 dpi for standard, 300 dpi for high quality
• Document Size: Auto, Letter, A4, or specific sizes
• Email Subject Line: Pre-fill default subject
Press OK to save and begin scanning.
Create a Shortcut for Reuse
- Select Yes when prompted to create a shortcut
- Choose an unused shortcut button on the control panel
- Assign a shortcut name (e.g., Scan-to-HR)
- Confirm with OK
Now, pressing the shortcut initiates a scan directly to the pre-configured email address.
Network Requirements for Scanner to Email
Proper network configuration is essential for reliable scanner to email functionality. Missing network settings cause most setup failures.
Test Connectivity
Ensure your scanner can reach the SMTP server by testing connectivity:
• Use telnet to test: telnet smtp.office365.com 587
• A successful connection confirms network reachability
• Firewalls must allow outbound traffic on port 587
Update DNS and SPF Records
Update your domain’s SPF record to include the scanner’s public IP address:
• Add: v=spf1 ip4:xxx.xxx.xxx.xxx include:spf.protection.outlook.com ~all
• This prevents emails from being marked as spam or rejected
Common Network Failures
These issues commonly cause scanner to email problems:
• Port 587 blocked by firewall
• Incorrect SMTP server name (smpt vs smtp)
• TLS handshake failure due to outdated device firmware
• DNS resolution problems
Troubleshooting Scanner to Email Problems
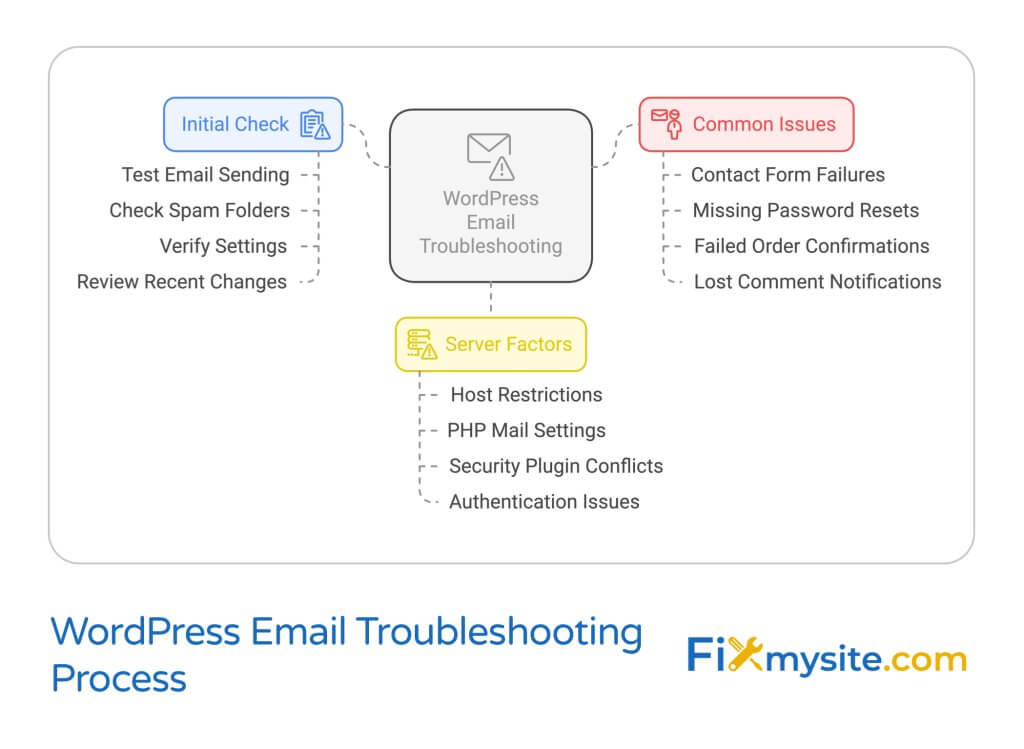
Even with correct configuration, scanner to email can fail. Here’s how to diagnose and fix common issues.
Emails Not Being Sent or Received
Possible causes include:
• Incorrect SMTP server name (check for typos like “smpt”)
• Port blocked by firewall
• TLS 1.2 not supported by older devices
• Invalid or expired credentials
• Mailbox lacks a license (Microsoft 365)
• MFA enabled without an app password
Diagnostic steps:
1. Verify SMTP server name and port
2. Confirm TLS 1.2 support on your scanner
3. Test network connectivity with telnet
4. Check mailbox status in Microsoft 365 Admin Center
Authentication Fails Despite Correct Password
This usually happens because basic authentication is disabled in your tenant. Fix this by enabling modern authentication, using an app password if MFA is on, or switching to SMTP relay via connector.
Emails Going to Spam or Junk
Ensure sender email and name are properly configured in your scanner settings. Whitelist your printer’s IP address in email server settings or update your SPF record to include the scanner’s public IP.
Sudden Failure After Previously Working
Recent changes that trigger failures include:
• Password change on the scanning account
• License removed from scanning mailbox
• Account disabled in Azure AD
• IT policy update blocking legacy auth
• Firmware update on the device
Recreate the scanning mailbox and reconfigure SMTP settings if needed.
Security Best Practices for Scanner to Email
Scanner to email poses security risks, especially in environments handling sensitive data. Follow these best practices.
Enable Encryption
Use these security measures:
• Ensure your MFP sends emails over encrypted connections (STARTTLS)
• Use IPPS (Internet Printing Protocol Secure) for secure device communication
• Enable data-at-rest encryption on the device
Implement Access Control
Require user authentication at the MFP using:
• Username and password
• Smart card or key fob
• Biometric verification
This prevents unauthorized use of scan to email on shared office devices.
Maintain Audit Trails
Enable audit logging to track:
• Who scanned documents
• When and where scans occurred
• Recipient email addresses
This helps detect misuse and supports compliance in regulated industries.
Consider Secure Alternatives
For sensitive documents, consider these options:
• Scan to encrypted cloud storage with access controls
• Use e-signature platforms for document approval
• Implement secure print release systems
Mobile Alternatives to Scanner to Email
When direct scanner to email isn’t supported or fails, mobile scanning offers reliable alternatives.
iPhone and iOS
- Open the Notes app
- Tap the Camera icon and select Scan Documents
- Position the document in the viewfinder
- Tap Save to store the scan
- Export as PDF and attach to email
Android
- Open Google Drive app
- Tap + and select Scan
- Position the document and capture the image
- Use tools to crop, rotate, or enhance
- Tap Save to generate a PDF
- Share via email or cloud link
Windows and Mac
Windows users can open the Windows Scan app, select their scanner, choose Document as the file type, scan, and save as PDF before attaching to email. Mac users can open Image Capture, select their scanner, choose PDF format, and scan before attaching to email manually.
Key Takeaways for Setting Up Scanner to Email
Setting up scanner to email requires attention to both device configuration and email server settings. Success depends on accurate SMTP settings (correct server, port, encryption), proper network connectivity and DNS configuration, using licensed and active mailboxes with appropriate authentication methods, and understanding modern security requirements like Microsoft Entra ID and connector-based relay.
Always test your configuration after setup and restart the device after major changes. Use app-specific passwords for enhanced security and prefer port 587 with TLS over port 25. Assign sender name and address to avoid spam filtering. For personal use, mobile scanning apps like Notes, Google Drive, or Adobe Scan offer reliable alternatives. In enterprise environments, integrate with on-premise email servers or use SMTP relay connectors for better compatibility.
Frequently Asked Questions About Scanner to Email
Why does my scanner say email sent but nothing arrives?
This typically indicates an SMTP configuration error. Common causes include a typo in the server address (smpt instead of smtp), an unlicensed mailbox in Microsoft 365, or missing app passwords when MFA is enabled. Check your sent folder, spam folder, and verify all settings in the scanner configuration.
Can I use my personal Gmail account for scanner to email?
Yes, but you must generate an app password. Google no longer allows regular passwords for less secure apps. Enable 2-Step Verification in your Google Account, then create an app password under Security > App passwords. Use this 16-digit password in your scanner settings.
What SMTP port should I use for scanner to email?
Use port 587 with STARTTLS encryption for most email providers. Port 465 (SSL) works for some providers, but port 25 is often blocked by ISPs and email providers due to spam concerns. Port 587 is the recommended choice for scanner to email.
Why does Microsoft 365 reject my scanner emails?
Microsoft 365 has deprecated basic authentication. Your scanner must either use an app password with MFA enabled or use SMTP relay via a connector. You also need a valid license assigned to the scanning mailbox. Check the Exchange Admin Center for message trace logs to see rejection reasons.
How do I find my scanner’s IP address?
On most printers, swipe down from the status center on the control panel to view the IP address. Alternatively, print a network configuration page from the printer settings menu. You can also access your router’s connected devices list to find the printer’s IP address.
Can I scan to email without a network connection?
No. Scanner to email requires network connectivity to reach the SMTP server. If your scanner is USB-connected only, you cannot use scan to email directly. Instead, scan to your computer and attach the file to an email manually, or consider using mobile scanning apps as an alternative.