You plug in your Foxwell scanner, press the power button, and nothing. Or worse, your scanner powers on but shows “No Communication with Vehicle” or fails to read any codes. You are not alone. Thousands of technicians and DIYers face the Foxwell scanner not working issue every month. But here is the good news: in over 70% of cases, the problem is not the scanner. It is your vehicle electrical system, OBD-II port, or a simple fixable glitch.
This guide gives you a step by step professional troubleshooting system built from real world diagnostics and Foxwell technical specs. You will learn how to diagnose power issues, test your OBD-II port, update firmware, and restore communication, often in under 10 minutes. Whether you own an NT510 Elite, i53BT, NT680Pro, or another Foxwell model, this guide gives you the exact steps to get back up and running.
Test OBD-II Power and Ground

Before blaming your Foxwell scanner, verify the OBD-II port is delivering power and ground. A dead port mimics scanner failure.
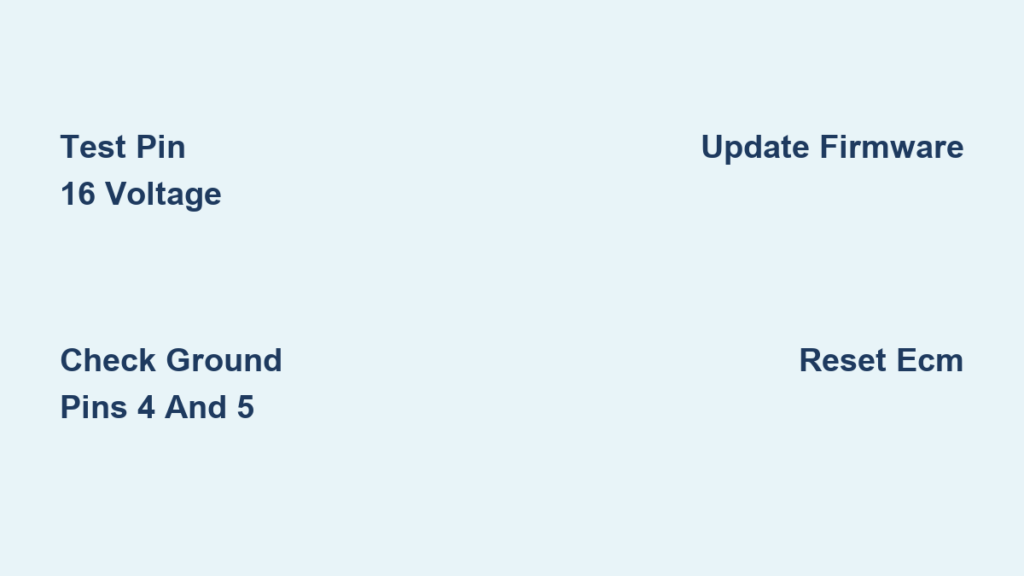
Check Voltage at Pin 16
Pin 16 supplies power to your scanner. If it is dead, your device will not turn on.
Follow these steps:
- Turn ignition to Run position, engine off.
- Set multimeter to DC voltage.
- Place red probe on Pin 16, black probe on Pin 4 or 5.
- Read the voltage.
If you get 11 to 14.5 volts, the power is good. If you get below 11 volts or zero volts, there is no power.
When voltage is low or zero, check the DLC, ECM, PCM, or accessory fuses, which are often 10A or 15A. Inspect wiring between the fuse box and OBD-II port for breaks.
Warning: On older vehicles, pre-2000, the OBD-II circuit may share power with the cigarette lighter. A blown lighter fuse can kill scanner power.
Verify Ground at Pins 4 and 5
Even with power, poor grounding blocks communication.
Test ground with these steps:
- Set multimeter to continuity or ohms mode.
- Touch one probe to Pin 4, the other to a clean metal chassis point.
- Listen for a beep or check resistance.
Less than 1 ohm or an audible beep means good ground. No beep or high resistance means bad ground.
If ground is faulty, clean connection points and check for corroded or broken ground wires.
Pro Tip: Use a paperclip test. Insert a paperclip into Pin 4. If it wobbles or feels loose, the terminal is worn and needs repair.
Inspect OBD-II Port Condition
A damaged or dirty OBD-II port is a top cause of failed connections, especially on older vehicles.
Look for Bent or Missing Pins
Use a flashlight to inspect all 16 pins. Pins 6 and 14, the CAN bus pins, are critical for modern vehicles. Pin 16, the power pin, must be straight and intact. Pins 4 and 5, the ground pins, should not be bent.
If pins are bent, gently straighten them with a fine needle tool. Never force the scanner in.
Clean Corrosion and Debris
Moisture, dirt, or oxidation can block contact.
Clean safely with these steps:
- Spray electrical contact cleaner into the port.
- Use compressed air to blow out residue.
- Let dry completely before reconnecting.
Best Practice: Apply dielectric grease after cleaning to prevent future corrosion.
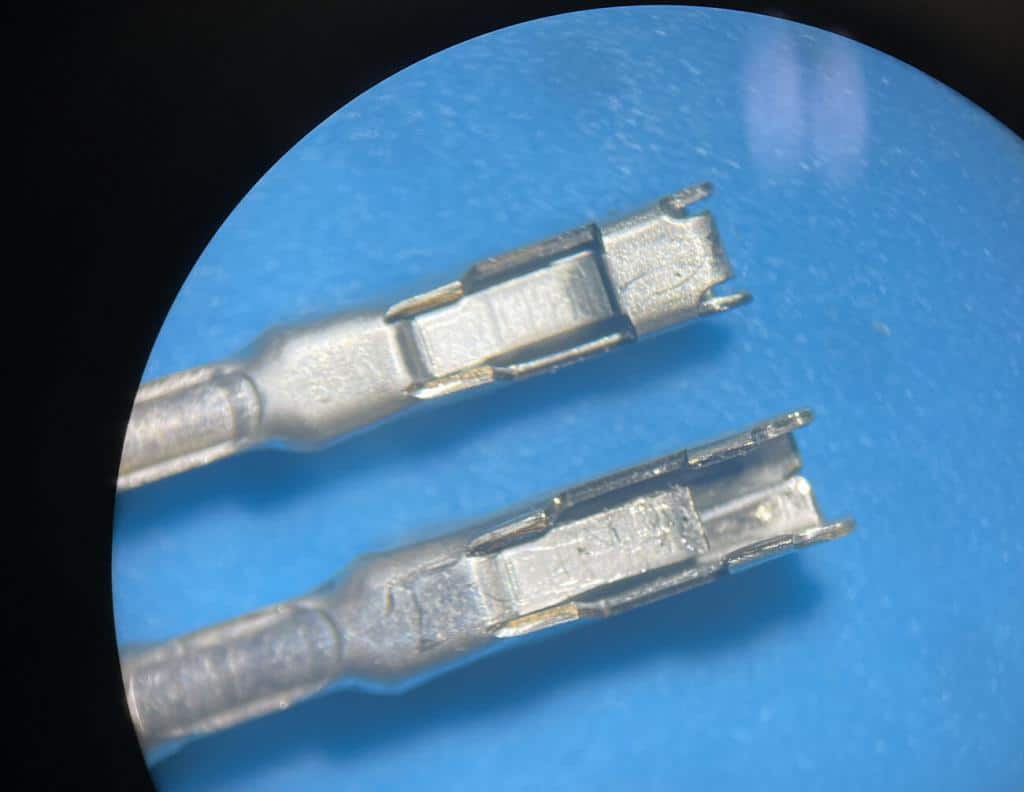
Repair Worn Female Terminals
Repeated use spreads terminals, causing loose connections.
Repair steps:
- Open the OBD-II housing with a small pick.
- Identify the terminal with front-facing clip.
- Depress the clip and pull the wire out.
- Use a flathead screwdriver to gently compress the inner metal fold.
- Reinsert until it clicks.
Field Case: A 2004 Nissan Frontier showed “Access failed” on all scanners. Inspection revealed only 6 terminals functional. Repair restored full communication.
Confirm Vehicle Battery Health
A weak battery can prevent ECU communication, even if the engine starts.
Test Battery Voltage
Minimum thresholds are resting voltage of at least 12.0V and running voltage of 13.5 to 14.8V.
Test with these steps:
- Turn off all accessories.
- Measure voltage across battery terminals.
- If below 12.0V, charge or replace the battery.
Note: Low voltage disrupts the handshake between ECU and scanner. Even 11.5V may cause “No Communication” errors.
Reboot the ECM
Sometimes the Engine Control Module is hung and unresponsive.
Reset procedure:
- Disconnect both battery terminals.
- Press brake pedal for 10 to 15 seconds to drain capacitors.
- Wait 2 to 5 minutes.
- Reconnect battery.
- Turn ignition to Run, wait 30 seconds.
- Retry scanner.
Caution: Some vehicles require post-reset procedures like radio code or window relearn. Check your manual first.
Update or Restore Foxwell Firmware
Outdated or corrupted firmware is a leading cause of scanner not working errors.
Check Current Firmware Version
- Power on scanner.
- Go to Settings, then System Info.
- Note the firmware version.
- Visit foxwelltech.com to check the latest version.
If outdated, connect to PC with a high-quality USB cable. Use Foxwell Update Tool software. Download and install the update.
Critical: Never unplug during update. Power loss can corrupt firmware.
Recover from Failed Firmware Update
If scanner is stuck in boot loop, black screen, or constant reboot, try these steps:
- Reconnect to PC and retry update.
- Use Foxwell Recovery Mode if available for your model.
- Contact Foxwell Support with serial number for recovery tools.
Warranty Tip: Register your device at foxwelltech.com. Most models have a 1 to 2 year limited warranty for hardware and firmware issues.
Troubleshoot Wireless Models
Bluetooth models like the i53BT and i70BT add wireless convenience but also pairing issues.
Fix Bluetooth Pairing Failure
Common causes include scanner not in discoverable mode, old connections not cleared, app out of date, and Bluetooth permissions disabled.
Fix with these steps:
- Power on scanner and enter pairing mode.
- On phone or tablet, forget previous Foxwell devices.
- Open Foxwell App on iOS or Android.
- Re-pair following on-screen instructions.
- Ensure app is updated to latest version.
Pro Tip: Fully charge both scanner and mobile device before pairing.
Reduce Signal Interference
Bluetooth range is 3 meters or 10 feet maximum. Obstacles weaken the signal.
Avoid metal obstructions like engine block or firewall. Avoid ignition systems or alternators. Avoid Wi-Fi routers or other RF sources.
Fix: Move closer, turn off nearby electronics, or test in a different location.
Verify Vehicle Compatibility
Not all Foxwell scanners work on all vehicles. Mismatched protocols cause false failure reports.
Match Scanner to Vehicle Protocol
Foxwell models support different protocols. The NT530Plus supports CAN, GMLAN, SCP, and UBP, best for GM, Ford, and Chrysler. The NT680Pro supports CAN, K-Line, and VPW, best for BMW, Mercedes, VW, Audi. The i50Pro supports KWP2000 and ISO 9141-2, best for Asian and Domestic US vehicles. The NT204 supports generic OBD-II for P-codes only.
Check if your scanner supports your make, model, and year. Check if it supports manufacturer-specific protocols like GMLAN for GM.
Case Example: A Foxwell NT510 Elite failed on a 2003 BMW X5. Cause was lack of BMW-specific modules. Required ISTA-level tool for deep diagnostics.
Refresh PID List After Vehicle Change
Scanners use Parameter IDs to request data. If PIDs are not refreshed, you get “No Data.”
Fix with these steps:
- Use Re-scan for PIDs or Vehicle Identification function.
- Enter VIN if prompted.
- Allow full scan, which takes 1 to 2 minutes.
Best Practice: Always re-identify the vehicle when switching cars.
NT510 Elite: Module Detection Fixes
The Foxwell NT510 Elite often fails to detect ABS, SRS, or transmission modules. Here is how to fix it.
Power Up Modules Correctly
Some modules only activate in Run position.
Steps:
- Turn ignition to Run, engine off.
- Wait 15 to 30 seconds for modules to initialize.
- Start scan.
Clear Stored DTCs
Active or pending codes can block module access.
Action:
- Run full system scan.
- Clear all DTCs.
- Rescan. Modules may now appear.
Perform Factory Reset
Configuration errors cause silent failures.
Reset:
- Go to Settings, System, Restore Factory Defaults.
- Confirm reset.
- Reboot scanner.
Warning: This erases custom settings. Re-enter preferred units after.
Clean Scanner Pins and Port
Dirt on scanner pins causes intermittent contact.
Clean:
- Use contact cleaner and soft brush.
- Wipe pins gently.
- Let dry before use.
Run Full Diagnostic Checklist
Use this 16-step checklist to isolate and fix any Foxwell scanner not working issue.
Step 1: Ignition ON, Engine Off. Powers control modules.
Step 2: Check DLC, ECM, PCM fuses. Restores OBD-II power.
Step 3: Test Pin 16 voltage. Confirms power delivery.
Step 4: Test Pins 4 and 5 ground. Validates communication path.
Step 5: Test battery voltage. Ensures stable ECU operation.
Step 6: Inspect OBD-II port. Finds physical damage.
Step 7: Clean scanner and port. Removes oxidation.
Step 8: Check firmware version. Ensures compatibility.
Step 9: Update firmware. Fixes bugs, adds support.
Step 10: Re-pair Bluetooth if wireless. Restores wireless link.
Step 11: Verify vehicle compatibility. Confirms protocol support.
Step 12: Test on another vehicle. Isolates scanner versus vehicle issue.
Step 13: Factory reset scanner. Clears configuration errors.
Step 14: Reboot ECM by battery disconnect. Resets unresponsive ECU.
Step 15: Refresh PID list. Updates data request table.
Step 16: Contact Foxwell Support. Gets expert help if all else fails.
Pro Move: Always test scanner on a known-working vehicle. If it fails there, the scanner is faulty. If it works, the issue is vehicle-side.
Prevent Future Scanner Issues
Avoid repeat failures with these simple maintenance habits.
Update Firmware Regularly
Every 3 to 6 months, or before major jobs, use Foxwell Update Tool on a stable PC. Always finish updates with no mid-process disconnects.
Protect OBD-II Ports
Use dust caps when not in use. Clean ports every 6 months with contact cleaner. Avoid forcing scanner into tight ports.
Store Scanner Properly
Keep in a cool, dry place. Avoid extreme heat or cold. Do not drop or expose to moisture.
Charge Before Use
Low internal battery can prevent handshake. Fully charge before long diagnostic sessions.
Final Tip: Register your scanner at foxwelltech.com. You will get warranty coverage, firmware alerts, and direct support access.
Contact Foxwell Support
If all else fails, get direct help from the manufacturer.
Support options include website at foxwelltech.com, live chat during business hours, email support, video tutorials, diagnostic coverage checker, and firmware download portal.
Have ready your scanner model number like NT510 Elite, serial number on back or in settings, vehicle make, model, year, and error message like “No Communication.”
Frequently Asked Questions About Foxwell Scanner Not Working
Why does my Foxwell scanner show “No Communication”?
This usually means the OBD-II port is not receiving power or ground. Test Pin 16 for 12 to 14.5V and Pins 4 and 5 for continuity. Also check your vehicle battery voltage and fuses.
Can a weak battery cause my Foxwell scanner to fail?
Yes. If battery voltage is below 11.5V, the ECU may not communicate properly with the scanner. Test resting voltage, which should be at least 12.0V.
How do I fix bent pins in my OBD-II port?
Use a fine needle tool to gently straighten bent pins. Be careful not to break them. Apply electrical contact cleaner after straightening.
Why is my Foxwell NT510 Elite not detecting modules?
Make sure ignition is in Run position, not Accessory. Clear any stored DTCs and perform a factory reset. Update firmware to the latest version.
How do I update Foxwell scanner firmware?
Connect scanner to PC using a high-quality USB cable. Download Foxwell Update Tool from foxwelltech.com. Run the tool and follow on-screen instructions. Never disconnect during the update process.
What should I do if my Foxwell scanner is stuck in boot loop?
Reconnect to PC and try updating firmware again. If that fails, contact Foxwell Support with your serial number for recovery tools or warranty service.
Key Takeaways for Fixing Your Foxwell Scanner
The Foxwell scanner not working issue is rarely the scanner itself. In most cases, the problem lies in vehicle-side electrical issues like power loss at Pin 16, poor ground at Pins 4 and 5, or a weak battery. Always test these first before assuming scanner failure.
Regular maintenance prevents most issues. Update firmware every 3 to 6 months, keep OBD-II ports clean, use protective caps, and fully charge your scanner before diagnostic sessions. These simple habits extend device life and ensure reliable performance.
When all else fails, Foxwell Support is your final resource. Register your device at foxwelltech.com to access warranty coverage, firmware alerts, and direct technical assistance. With systematic troubleshooting, you can resolve over 95% of Foxwell scanner communication issues and get back to diagnostics quickly.