If you’ve ever stared at your Canon printer, unsure how to turn a paper document into a digital file, you’re not alone. Learning how to use a Canon scanner can feel confusing, especially with multiple methods, apps, and settings across different models. But once you understand the core workflows, scanning becomes fast, reliable, and essential for home, school, or office use.
This guide covers every way to scan with your Canon device. Whether you’re using a Pixma, Maxify, or MG series, you’ll learn how to scan directly from the printer, via computer, or wirelessly from your smartphone. You’ll also discover how to prepare documents, choose the right software, avoid common errors, and produce clean, professional scans every time.
Prepare Your Documents for Scanning
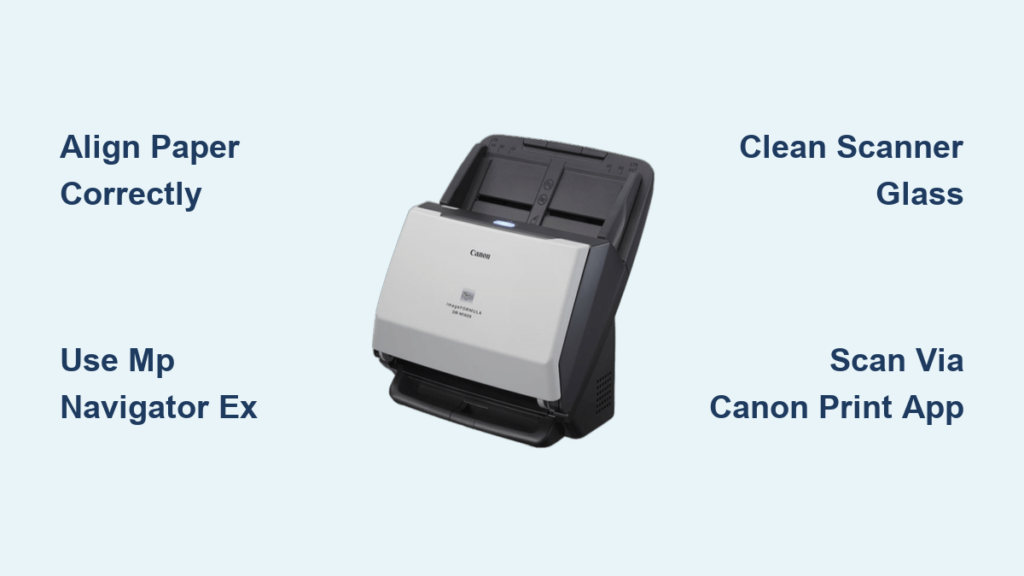
Align Paper Correctly on the Glass
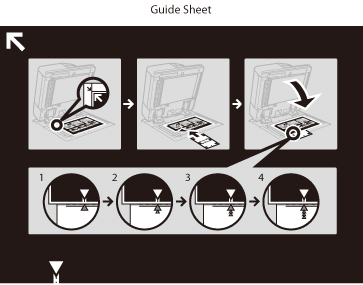
Place your document face-down on the scanner glass. Match the top-left corner of the paper with the engraved arrow or alignment marker near the corner of the glass. Slide it gently into position so both top edges are flush. This prevents skewed or cropped scans.
Pro Tip: Never force paper into place. Misalignment is the most common cause of partial or distorted scans.
Handle Thick or Bound Materials
For books, notebooks, or bound reports, lift the scanner lid to its full hinge height. Position the open book flat on the glass without pressing down hard. Avoid slamming the lid shut because it can damage spines or crack the glass.
Caution: Do not use heavy objects to flatten pages. Over time, this stresses the scanner mechanism.
Use ADF When Available
Models like the Canon Maxify MB5420 include an Automatic Document Feeder that holds 30 to 50 sheets. Insert pages top-edge first, scanning side up. Never feed stapled, folded, or taped documents because they cause jams.
Note: Most entry-level Canon printers like the TS3420, TR3720, and MG2500 do not have an ADF. You must manually replace pages for multi-page scans.
Scan Without a Computer Using Control Panel Buttons
If you only need a physical copy with no digital file involved, use your printer’s control panel. This method works like a photocopier and is supported on models like the Canon Pixma TS3420, TR3720, and MG7720.
Follow these steps to scan directly:
- Power on the printer and ensure it displays ready status.
- Load paper into the input tray and extend the output tray fully.
- Open the scanner lid and place your document face-down, aligned with the top-left arrow.
- Close the lid gently to prevent glare.
- Press the Black Button for black and white copies or the Green Button for color copies.
- Tap the button repeatedly to set the number of copies.
- Wait 14 to 20 seconds per page for the copy to complete.
Warning: This method creates a printed copy only. No digital file is saved unless you use software-connected methods.
Scan from Windows PC: Three Methods
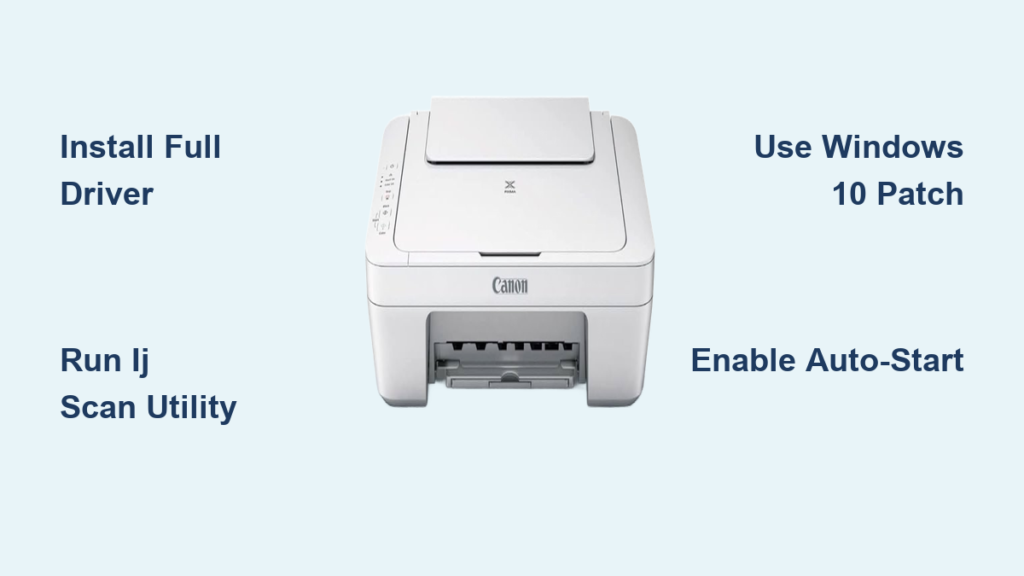
Install Required Software First
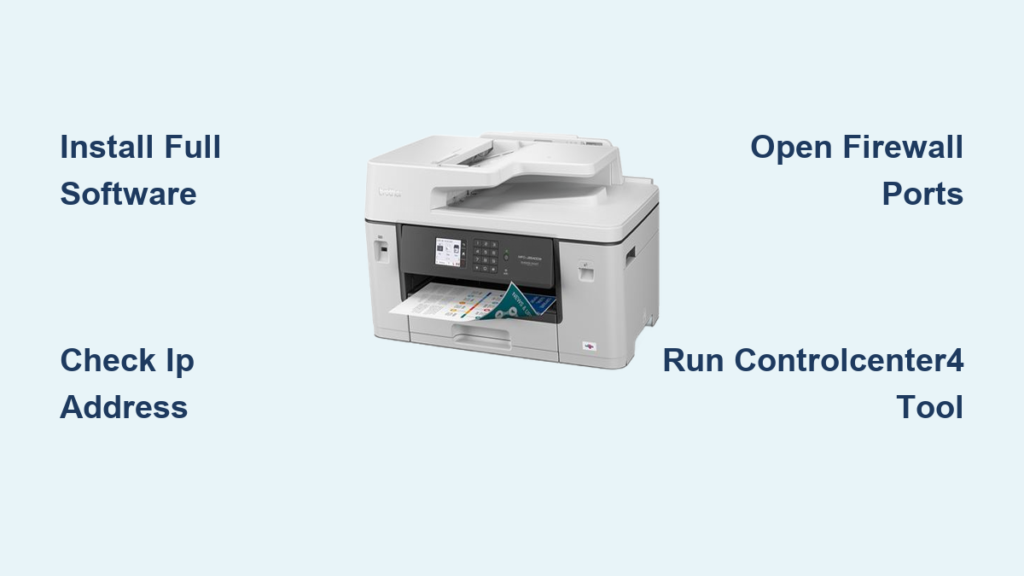
Before scanning, ensure your Canon printer is powered on and connected via USB or Wi-Fi. Download and install the full driver package from Canon’s official support website for complete functionality.
Key software tools include:
- Windows Scan App – Built-in, basic scanning tool
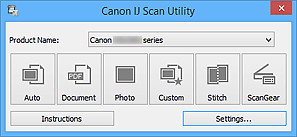
- Canon IJ Scan Utility – Simple interface with auto modes
- MP Navigator EX – Full control, batch scanning, and OCR preview
Expert Note: Always use the full driver installer. The basic driver lacks scanning tools.
Quick Method: Windows Scan App
- Open Settings, then go to Devices, and select Printers and Scanners.
- Choose your Canon printer from the list.
- Click Manage, then select Open Scanner.
- Choose your format: PDF or JPEG.
- Click Scan and wait for completion.
- Click View, then Save, choose your location and filename, and confirm.
Limitation: This method offers minimal settings. Use it for quick, simple scans only.
Best Method: MP Navigator EX
- Download and install MP Navigator EX from Canon’s support site.
- Launch it from Start, then Canon Utilities.
- Place your document face-down on the glass and close the lid.
- In the software, choose Document, Picture, or Auto scan mode.
- Click Scan and preview the result.
- For multiple pages, replace the paper and click Scan again to append.
- Export as PDF, JPEG, TIFF, or PNG.
Pro Tip: Use Batch Scan mode to automate multi-page jobs. This is ideal for contracts or reports.
Scan from Mac Computer
Add Your Printer to System Settings
- Go to Apple menu, then System Settings, and select Printers and Scanners.
- Click Add Printer or Scanner.
- Select your Canon printer from the available list.
- Click Add to complete registration.
Fix Detection Issues: Restart both printer and Mac. Reconnect the USB cable. Download the latest macOS driver from Canon if needed.
Configure and Start Your Scan
- Select your printer in Printers and Scanners and click Open Scanner.
- Place your document face-down, aligned with the top-left marker.
- In the scanner window, configure these settings:
- Source: Flatbed or ADF
- Color Mode: Color or Black and White
- Resolution: 200 dpi for documents, 1200 dpi for photos
- Paper Size: Letter, A4, or custom
- Format: PDF, JPEG, or PNG
- Enable Combine into Single Document to create multi-page PDFs.
- Click Scan and replace pages as prompted.
- Save your file to your chosen destination folder.
User Verified: Multi-page PDF creation works reliably when all settings remain unchanged across scans.
Scan from iPhone or Android Smartphone
Install the Canon PRINT App
Download Canon PRINT Inkjet/SELPHY from the App Store for iOS or Google Play for Android.
Register Printer to Wi-Fi
- Open the app and tap the printer icon, then select Register Printer.
- Tap Printer not found if prompted.
- Select No when asked about Wi-Fi Direct, then choose Auto Connection.
- On your printer, press and hold the Wi-Fi button (two ovals) for 2 seconds until it blinks.
- In the app, tap Yes, check the box, and tap Next.
- Enter your Wi-Fi password and tap OK, then Connect, then Yes.
- Wait for the green checkmark confirming successful connection.
Critical: Both your phone and printer must be on the same Wi-Fi network.
Start Scanning from Your Phone
- Open the scanner lid and place your document face-down, aligned with the top-left arrow.
- Close the lid and tap Scan in the app.
- Tap Change Settings to configure:
- Data Format: PDF (recommended) or JPEG
- Original Type: Document or Photo
- Color: Color or Black and White
- Original Size: Letter (default)
- Tap Back, then tap Scan. Scanning takes 14 to 15 seconds.
- For multi-page documents, remove the current page, insert the next one, and tap Scan again.
Result: Pages automatically combine into one PDF file.
Share or Save Your Scan
After tapping Exit, the file saves to your phone storage. Access it through Photos on iPhone or File Manager on Android. Share via email, Google Drive, iCloud, Dropbox, or social media apps.
Best Practice: Clean the glass before scanning. Fingerprints cause dark spots in your scans.
Choose the Right File Format
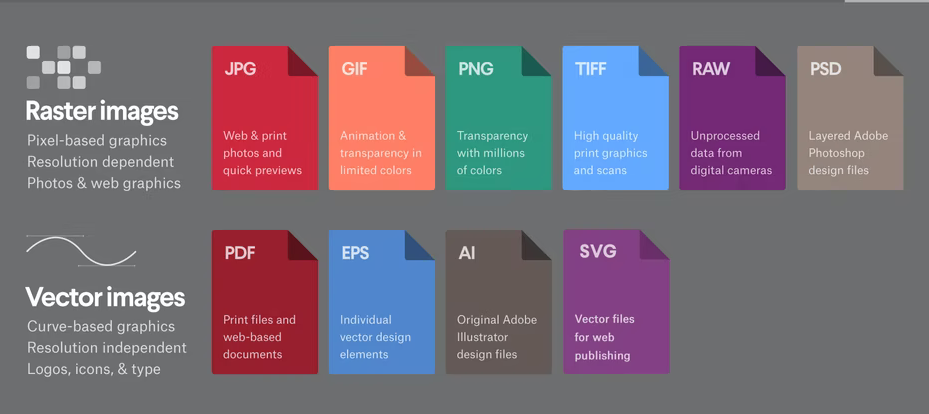
PDF for Documents
Use PDF for contracts, forms, receipts, or any text-based document. It preserves layout and supports multi-page files. This format is ideal for email or digital filing.
JPEG for Photos
Choose JPEG for images, artwork, or visual content. This format creates smaller files, perfect for sharing online.
TIFF for Archival Quality
Use TIFF when you need lossless quality. This format is ideal for scanning important records or photos you plan to edit. Files are larger, but no compression quality is lost.
PNG for Graphics
PNG supports transparency and high detail. This format works great for diagrams, logos, or web graphics.
Multi-Page PDF Tip: This feature is only enabled in MP Navigator EX, the Canon PRINT app, and macOS Open Scanner with the Combine option.
Connect Your Scanner Properly
Use USB for Stability
USB offers the fastest and most reliable connection. Plug-and-play setup requires no network configuration. This method is ideal for high-volume or high-resolution scans.
Recommendation: Use USB when scanning more than 5 pages or at 600 or higher dpi.
Use Wi-Fi for Convenience
Wi-Fi requires no cables and allows scanning from anywhere on your network. Initial setup is required, and connections can drop during long scans.
Fix Connection Drops: Lower your resolution or switch to USB for critical jobs.
Try Wi-Fi Direct
Wi-Fi Direct connects your phone directly to the printer without a router. This is useful when no Wi-Fi network is available. The pairing is temporary and turns off after use.
Use Case: Scanning while traveling or in temporary workspaces.
Ethernet for Office Models
Ethernet is available on Canon Maxify series printers. This option offers wired network stability for shared office scanning.
Fix Common Scanning Problems
Scanner Not Detected
Causes: Missing drivers, wrong connection, or printer is off or offline.
Solutions: Reinstall the full driver from Canon’s website. Restart both printer and computer. Try USB instead of Wi-Fi. Re-add the printer in your system settings.
Poor Scan Quality
Symptoms: Blurry, dark, or streaked output.
Fixes: Clean the scanner glass with a lint-free cloth and isopropyl alcohol. Increase your resolution to 200 or higher dpi for text. Avoid overhead lighting when scanning glossy paper.
Document Skewed or Cut Off
Re-align your document with the top-left marker. Ensure no paper overhangs the edges. Do not lift the lid during scanning.
Multi-Page PDF Won’t Combine
On Mac, enable the Combine into Single Document option. On mobile, keep all settings identical across scans. On MP Navigator EX, use Batch Scan mode.
App Can’t Connect to Printer
Press and hold the Wi-Fi button for 2 seconds to re-enable pairing mode. Confirm both devices are on the same network. Re-register the printer in the Canon PRINT app.
Optimize Scanning Performance
Clean Scanner Glass Weekly
Wipe the glass with a soft, dry, lint-free cloth. For smudges, lightly dampen the cloth with isopropyl alcohol. Never spray cleaner directly on the glass.
Avoid: Ammonia-based cleaners because they damage the anti-reflective coating.
Set Correct DPI
Use 150 to 200 dpi for standard documents and receipts. Use 300 dpi for archival text, forms, and contracts. Use 600 to 1200 dpi for photos and detailed artwork.
Warning: Higher dpi means larger files and slower scans. Use only when necessary.
Avoid Glossy Paper Glare
Glossy documents reflect light and cause white spots. Reduce overhead lighting or scan in a dimmer room.
Scan in Batches
Use MP Navigator EX or the Canon PRINT app to scan multiple pages into one file. This saves time and keeps documents organized.
Name Files Clearly
Use descriptive names like Invoice_Acme_Jan2025.pdf or Contract_Smith_Signed.pdf. Avoid generic names like Scan001.
Back Up Important Scans
Save copies to cloud services like Google Drive, iCloud, or OneDrive. Also save to an external hard drive or email the file to yourself for safekeeping.
Model-Specific Tips
Canon MG2500 Series
This series has no display screen. You must use a computer or mobile app. USB connection is recommended for reliability. It supports MP Navigator EX and the Windows Scan App.
Canon TS3420
This model has Black and Green scan buttons for copying. It supports direct Wi-Fi setup. Use the Canon PRINT app for mobile scanning. Install MP Navigator EX for best desktop control.
Canon TR3720 / TR3722
These models feature an LCD screen showing copy count. Use the Black and Color buttons for direct copying. Mobile scanning works through the Canon PRINT app. No ADF is included, so manual page replacement is required.
Canon Maxify (e.g., MB5420)
This series is built for small business use. It includes an ADF with 30 to 50 sheet capacity. It supports high-speed batch scanning. Use MP Navigator EX or IJ Scan Utility for best results.
Canon MG7720
This model offers excellent Mac compatibility. It appears in the Printers and Scanners panel. It supports photo scanning at high quality. Use MP Navigator EX for OCR preview.
When to Use Which Method
Need a Physical Copy Fast?
Use control panel buttons. Tools needed: Printer only.
Scan to PDF on PC?
Use MP Navigator EX. Best for full control and multi-page jobs.
Wireless Scanning?
Use the Canon PRINT app. Ideal for quick mobile digitization.
Share Immediately?
Scan via smartphone app, then email or upload to cloud.
Archive Important Documents?
Use MP Navigator EX at 300 or higher dpi. Save as PDF or TIFF.
Scan on Mac?
Use Open Scanner or MP Navigator EX. Ensure the driver is installed.
Frequently Asked Questions About Using Canon Scanners
How do I start scanning on my Canon printer?
Power on your printer and place a document face-down on the scanner glass. For Windows, use the Windows Scan App or MP Navigator EX. For Mac, use Open Scanner. For mobile, use the Canon PRINT app. Select your settings and click Scan.
Can I scan without a computer?
Yes. Use the control panel buttons on models like the TS3420 or TR3720. Press the Black or Green button to make copies. This creates printed copies only, not digital files.
Why is my Canon scanner not detected?
Missing or outdated drivers are the most common cause. Reinstall the full driver from Canon’s support website. Restart both your printer and computer. Try a USB connection if Wi-Fi continues to fail.
How do I scan multiple pages into one PDF?
Use MP Navigator EX on Windows, the Canon PRINT app on mobile, or macOS Open Scanner with the Combine into Single Document option enabled. Keep all settings identical for each page.
What resolution should I use for scanning documents?
Use 200 dpi for standard documents and receipts. Use 300 dpi for archival-quality text, forms, and contracts. Use 600 to 1200 dpi only for photos or detailed artwork.
Why are my scans blurry or dark?
Dirty scanner glass causes most quality issues. Clean the glass with a lint-free cloth and isopropyl alcohol. Increase your dpi setting. Ensure good, even lighting in the room.
Key Takeaways for Successfully Using Your Canon Scanner
Mastering how to use a Canon scanner transforms paper documents into organized, searchable, shareable digital files. The key is choosing the right method for your needs: control panel buttons for quick copies, MP Navigator EX for full desktop control, or the Canon PRINT app for wireless mobile scanning.
Always prepare documents properly by aligning them with the top-left marker on the glass. Clean the scanner glass weekly to maintain clear scans. Use USB connection for important or high-volume jobs to avoid Wi-Fi dropouts. Save your files with descriptive names and back them up to the cloud.
By following these procedures and using the appropriate tools for your Canon model, you’ll achieve efficient, high-quality digitization every time you scan.