If you’ve just set up your Epson all-in-one printer and are wondering how to use the scanner, you’re not alone. Whether you’re digitizing documents, saving receipts, or scanning photos, knowing how to use an Epson scanner efficiently saves time and improves quality. This guide walks you through every step, from initial setup and software installation to scanning via control panel, desktop app, or mobile device.
You’ll learn best practices for flatbed and ADF scanning, optimal settings for different use cases, and how to troubleshoot common issues. By the end, you’ll be able to scan confidently across Windows, macOS, and mobile devices using any Epson EcoTank or all-in-one model.
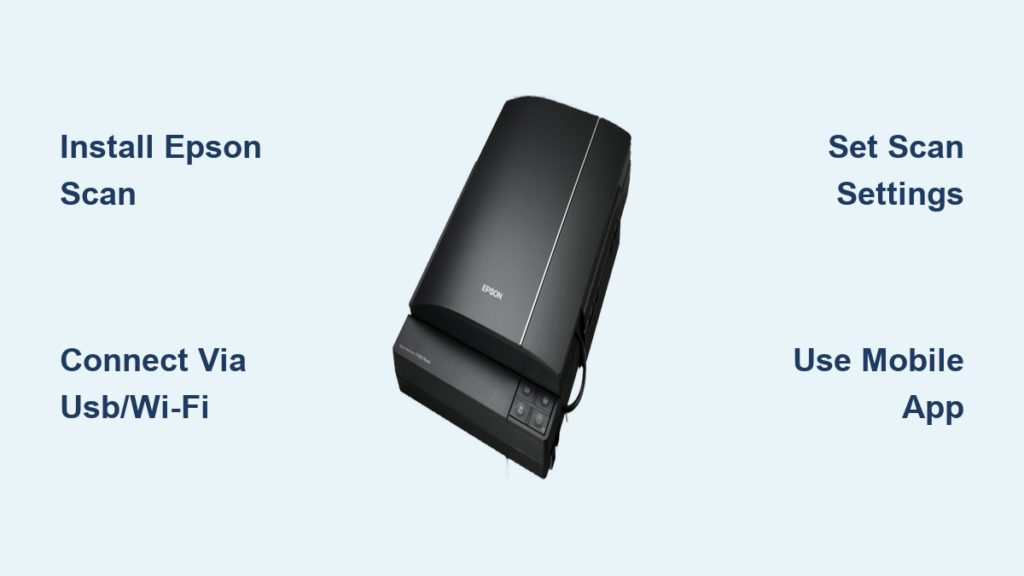
Install Epson Scan Software
Download Epson Scan Smart
To use your Epson scanner, you need the correct software. Epson Scan Smart is the modern app for fast, intuitive scanning on Windows and macOS. Visit epson.com/support, enter your model number like ET-2850 or L3210, and download Epson Scan Smart. Always install from the official site to avoid third-party bloatware that might slow down your system.
Run the Installer
Open the downloaded file and follow the setup wizard. Click Next, accept the EULA, and allow the installer to configure drivers. If prompted, install Epson Scan 2 for advanced features. After installation, restart your computer if required. The Epson Scan Smart icon will appear on your desktop once the installation completes successfully.
Verify Installation
Launch Epson Scan Smart. If the app opens and detects your scanner connected via USB or Wi-Fi, the installation was successful. If not, check that connections are secure and ensure your printer is powered on. Reinstall the software only if the scanner remains undetected after checking these basics.
Connect Your Scanner

Use USB for Direct Connection
Plug one end of a USB 2.0 cable into your Epson printer’s rear port and the other into your computer. The system should detect the device automatically. On the printer’s display, tap OK when your computer’s name appears. This method ensures stable, plug-and-play scanning with minimal setup time.
Set Up Wi-Fi Scanning
For wireless convenience, connect your Epson scanner to Wi-Fi. Press Home on the control panel, go to Wi-Fi Setup, select Wi-Fi Recommended, then choose Wi-Fi Setup Wizard. Select your network from the list and enter the password. Wait for the “Setup Complete” message to appear. Both your printer and computer or phone must be on the same network for wireless scanning to work properly.
Enable Mobile Network Sync
To scan from your phone, ensure both the Epson printer and mobile device are on the same Wi-Fi network. Open the Epson Smart Panel app after installation. It will auto-detect available devices nearby. Tap to connect. If the printer doesn’t appear, restart both devices and check your network settings.
Start Scanning from Control Panel
Select Computer as Destination
Press the Scan button on your Epson printer. Choose Computer from the options displayed on the screen. Wait for your device name to appear, then press OK. This tells the scanner to send the scanned file directly to your laptop or desktop computer.
Place Document Correctly
For single-page scanning, open the lid and place the document face-down on the glass. Align the top-right corner with the engraved arrow marker for accurate positioning. For multi-page jobs, load sheets face-up into the ADF tray. Fan the pages first to prevent jams and ensure smooth feeding through the automatic document feeder.
Begin the Scan
Press the Start button on the printer. The scan begins immediately. On your computer, Epson Scan Smart will open and display the scanned image. The file saves to your default folder, usually the Desktop, unless you’ve changed this setting in the software preferences.
Use Epson Scan Smart App

Launch and Detect Device
Open Epson Scan Smart on your computer. The app automatically detects connected scanners. If multiple devices are available, select your model from the dropdown menu. If no device appears, check your USB or Wi-Fi connections and restart the app to refresh the device list.
Choose Scan Settings
Before scanning, configure these essential settings based on your needs:
• Document Size: Letter, A4, or Legal depending on your paper
• Image Type: Color, Grayscale, or Black & White for text
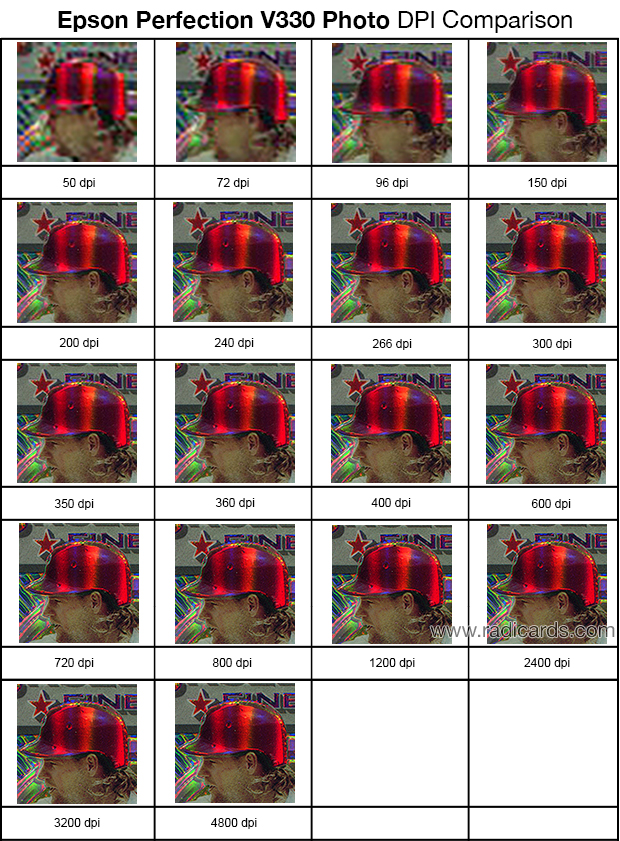
• Resolution: 200 DPI for text, 300 DPI for standard use, 600 DPI for photos
• File Format: PDF for documents, JPEG for images, PNG for graphics, TIFF for archival
Click Show Advanced Settings for additional options like cropping, brightness, or contrast adjustments.
Start and Save Scan
Click Scan. The preview appears within seconds. Review the quality carefully and zoom in if needed to check details. Click Save to store the file. Use Scan+ to add more pages for multi-page PDFs. Rename the file and choose a specific folder like “Scanned Documents” for better organization.
Scan from Mobile with Smart Panel
Open Epson Smart Panel App
Launch the app on your iOS or Android device. Ensure your phone and Epson printer are on the same Wi-Fi network. The app displays your connected printer automatically. Tap the Scan tile on the home screen to begin the scanning process.
Configure Mobile Scan Settings
Set these options before scanning:
• Scan Size: Match to your paper size like A4 or Letter
• Image Type: Color or Black & White depending on content
• Resolution: 200 DPI for text documents, 600 DPI for photos
• Format: PDF for documents, JPEG for images
Tap Start. The scanner activates and sends the image to your phone in about 12 seconds at 200 DPI resolution.
Edit and Share Scanned File
After scanning, preview the image on your screen. Use pinch-to-zoom to inspect details, rotate if needed, or crop to remove unwanted edges. To discard and rescan, tap the trash icon. For multi-page documents, tap Scan+, add each page, then tap Next when finished. Rename the file, choose a folder, and tap Save twice to confirm.
Share Instantly
Tap Share to send your scanned file through multiple channels:
• Email or Messages
• WhatsApp or AirDrop
• Google Drive or OneDrive
• Any file-sharing app installed on your device
This feature is ideal for sending contracts, homework, or receipts directly from your phone without transferring files to a computer first.
Optimize Scan Settings
Pick the Right Resolution
Use 200 DPI for standard text documents. This setting is fast and produces efficient file sizes. Choose 300 DPI for general use or OCR processing that extracts editable text. For photos or detailed artwork, use 600 DPI to capture fine details. Higher DPI increases both file size and scan time significantly, so use only when necessary for quality.
Select Correct File Format
Each format serves different purposes:
• PDF: Best for text, forms, and multi-page documents. Preserves layout perfectly.
• JPEG: Ideal for photos. Creates smaller files through compression.
• PNG: Lossless quality. Good for graphics requiring transparency.
• TIFF: High fidelity with large files. Use for archival or professional printing needs.
Set Image Type by Content
Choose the appropriate image type for your content:
• Color: For photos, colored documents, or artwork with multiple colors
• Grayscale: For text with shading or gray-scale images
• Black & White: For clean text documents or line drawings only
Avoid using Remove Background settings as they often distort text and produce unreliable results.
Use ADF for Multi-Page Scans
Load Pages into ADF
For scanning reports, contracts, or book pages, use the Automatic Document Feeder. Load up to 20 to 30 sheets face-up into the tray. Fan them first to prevent double-feeding problems. Do not overload the tray or use wrinkled or damp paper that could cause jams.
Scan to Single PDF
In Epson Scan Smart or Smart Panel, select PDF as your output format. After the first page scans, tap Scan+ to add more pages. Each page feeds automatically through the ADF. Finalize with Next, then Save. The result is one organized PDF file containing all your pages.
Prevent ADF Jams
Clean the ADF rollers monthly with a dry lint-free cloth to maintain smooth feeding. Replace worn paper that has folds or damage. If jams occur, open the ADF cover gently and remove stuck paper without forcing it. Avoid pulling sheets强行. Restart the scanner after clearing a jam to reset the mechanism.
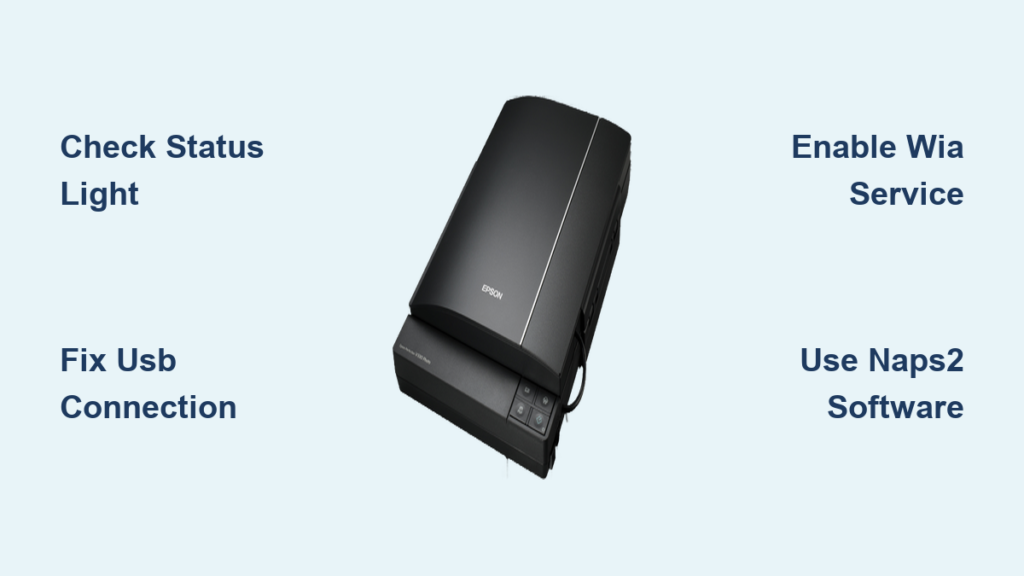
Troubleshoot Common Problems
Scanner Not Detected
If your computer doesn’t see the Epson scanner, try these solutions:
• Ensure the USB cable is securely plugged into both devices
• Try a different USB port on your computer
• Reconnect to Wi-Fi and restart both devices
• Reinstall Epson Scan Smart or the device driver from epson.com
On Windows, check Device Manager under Imaging Devices. On Mac, verify in System Settings under Printers & Scanners.
Computer Not in Device List
When scanning from the control panel, if your computer doesn’t appear in the list, try these fixes:
• Confirm both devices are on the same Wi-Fi network
• Temporarily switch to USB connection for testing
• Restart your router and printer
• Disable firewall or antivirus temporarily as they sometimes block local network discovery
Poor Scan Quality
Blurred, dark, or incomplete scans usually stem from these causes:
• Dirty glass: Clean with a microfiber cloth and glass cleaner
• Low resolution: Use 300 DPI for text, 600 for images
• Wrong image type: Select Grayscale or Color instead of Line Art
• Misaligned document: Align with the arrow marker on the scanner bed
Rescan after adjusting these settings to improve quality.
App Fails to Connect
If Epson Smart Panel won’t connect to your printer, try these steps:
• Reboot the printer and your phone
• Forget and rejoin Wi-Fi on the mobile device
• Update the app from the App Store or Google Play
• Reset network settings on the printer through Wi-Fi Setup, then Restore Network Settings
Maintain Your Scanner
Clean the Scanner Glass Weekly
Dust and fingerprints degrade scan quality significantly over time. Turn off the scanner, open the lid, and wipe the glass with a lint-free cloth slightly dampened with isopropyl alcohol or glass cleaner. Avoid using paper towels or abrasive cleaners that can scratch the surface.
Update Software Regularly
Check epson.com/support quarterly for software updates. New versions fix bugs, improve compatibility with operating systems, and add features. Register your product online to receive update notifications directly and extend your support coverage.
Secure Your Device
Disable Wi-Fi Direct if you don’t use it. Remove saved networks before selling the printer to protect your information. Use a strong Wi-Fi password to prevent unauthorized access. Epson scanners don’t store scanned data, but controlling network access protects your device from potential intrusions.
Best Practices by Use Case
Scan Text Documents
For contracts, forms, or letters, use these optimal settings:
• Format: PDF
• Resolution: 200 to 300 DPI
• Image Type: Grayscale or Black & White
• Destination: A dedicated folder for easy retrieval
This combination is ideal for emailing or archiving text documents.
Digitize Photos
For photo scanning, configure these settings:
• Format: JPEG or TIFF
• Resolution: 600 DPI
• Image Type: Color
• Additional: Enable Automatic Rotation if needed
Save originals to cloud storage or an external drive to preserve them safely.
Prepare for OCR
To extract editable text from scanned documents, follow these guidelines:
• Scan in Grayscale or Color mode
• Use 300 DPI minimum for accurate recognition
• Save as PDF or TIFF format
• Keep text clean and horizontal within the frame
Use with OCR tools like Adobe Acrobat or Google Keep to convert scanned text to editable content.
Reduce File Size for Email
For email attachments, optimize with these settings:
• Format: PDF
• Resolution: 200 DPI
• Compression: Enable compression option in Epson Scan Smart
• Color: Avoid unnecessary color for text documents
This ensures quick delivery and maintains readability for recipients.
Key Takeaways for Using Your Epson Scanner
Mastering how to use an Epson scanner unlocks powerful home office capabilities. Whether you’re using a USB cable, Wi-Fi connection, or mobile app, the process is straightforward once set up correctly. Prioritize clean glass, proper document placement, and correct settings for the best scan results every time.
With Epson Scan Smart and Smart Panel, scanning is fast, reliable, and versatile across Windows, macOS, iOS, and Android platforms. Follow this guide to digitize documents efficiently, avoid common pitfalls, and get the most from your Epson all-in-one device. Regular maintenance and software updates will keep your scanner performing optimally for years to come.
Frequently Asked Questions About Epson Scanners
How do I connect my Epson scanner to my computer?
Connect your Epson scanner using a USB cable for direct plug-and-play connection, or set up Wi-Fi through the printer’s control panel. For USB, plug the cable into the printer’s rear port and your computer’s USB port. For Wi-Fi, go to Wi-Fi Setup on the printer, select your network, and enter the password. Ensure both devices are on the same network.
Why is my Epson scanner not detected by my computer?
This issue usually occurs due to missing drivers or loose connections. Reinstall Epson Scan Smart from epson.com/support. Check that the USB cable is securely connected or that Wi-Fi is working properly. Restart both devices and verify the scanner appears in Device Manager on Windows or System Settings on Mac.
What resolution should I use for scanning documents?
Use 200 DPI for standard text documents for fast scanning with small file sizes. Use 300 DPI for general use or when you need OCR text recognition. Use 600 DPI for photos or detailed artwork where fine detail matters. Higher DPI creates larger files and takes longer to scan.
Can I scan from my phone using an Epson scanner?
Yes, download the Epson Smart Panel app from the App Store or Google Play. Ensure your phone and printer are on the same Wi-Fi network. Open the app, select your printer, configure settings like resolution and format, then tap Start to scan. You can edit, save, and share directly from the app.
How do I scan multiple pages into one PDF file?
Load multiple pages into the ADF tray face-up. In Epson Scan Smart or Smart Panel, select PDF as the output format. After scanning the first page, tap Scan+ to add more pages. Continue until all pages are scanned, then tap Next and Save. This creates a single multi-page PDF file.