
Scanning negatives at home lets you revive decades-old memories, preserve family history, and take full creative control over your film photography. With the right scanner and technique, you can produce high-resolution digital images that outperform old photo prints in sharpness and detail. The key is using a flatbed scanner with a transparency unit—a built-in backlight that illuminates film from behind. Without this feature, your scanner cannot read negatives. Once equipped, the process involves careful cleaning, proper film placement, precise software settings, and smart post-processing. Whether you are digitizing 35mm rolls or medium format 120 film, this guide walks you through every step from setup to final edit so you get clean, vibrant scans every time.
Choose the Right Scanner for Negative Scanning
Only scanners with a built-in transparency unit can scan negatives effectively. This feature shines light upward through the film, making the image visible to the scanner sensor. Standard flatbed scanners without this function will produce black or near-black images when attempting to scan film.
Look for Scanners with Transparency Units
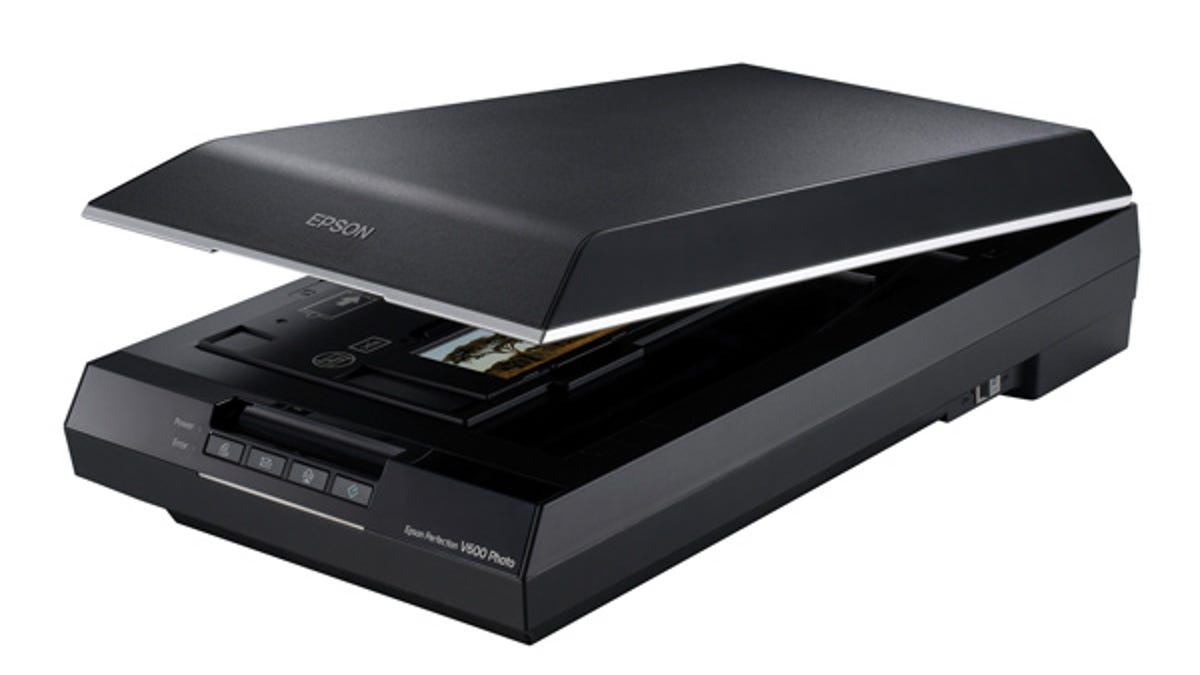
Scanner models labeled as “Photo” or “Film” editions typically include the necessary backlight. Popular consumer options include the Epson Perfection V370, V600, and the V850 Pro for archival-quality work. These scanners support multiple film formats including 35mm, 120, and slides.
Compare Scanner Types by Your Needs
Different scanners offer varying levels of quality, speed, and convenience depending on your workflow.
Flatbed scanners with film holders work well for home users who scan mixed formats. They are affordable and support multiple film types. Dedicated film scanners excel at high-volume 35mm work with automated feed systems, though they limit you to fewer formats. DSLR digitization using a camera and lens can produce exceptional resolution but requires manual handling and lacks built-in dust removal. Drum scanners deliver the highest detail possible but cost tens of thousands of dollars and are impractical for most users.
Most hobbyists achieve excellent results with an Epson V600, which supports multiple film types, includes film holders, and delivers quality scans for under $300.
Check for Infrared and Digital ICE Support
The Epson V850 Pro includes an infrared channel that enables Digital ICE technology for automatic dust and scratch removal. However, Epson’s native software only enables this feature on Windows, and not all film types are supported.
You can use third-party software like VueScan or SilverFast to unlock IR cleaning on Mac or Linux systems. Digital ICE works by scanning the image twice, once in visible light and once in infrared. Dust and scratches appear differently in infrared and get digitally removed. This feature may blur fine film grain on experimental films, so use it cautiously.
Prepare Your Equipment and Film
Dust on the scanner glass transfers directly to your scans, creating distracting specks that require time-consuming editing. Taking a few minutes to clean before scanning saves significant post-processing effort.
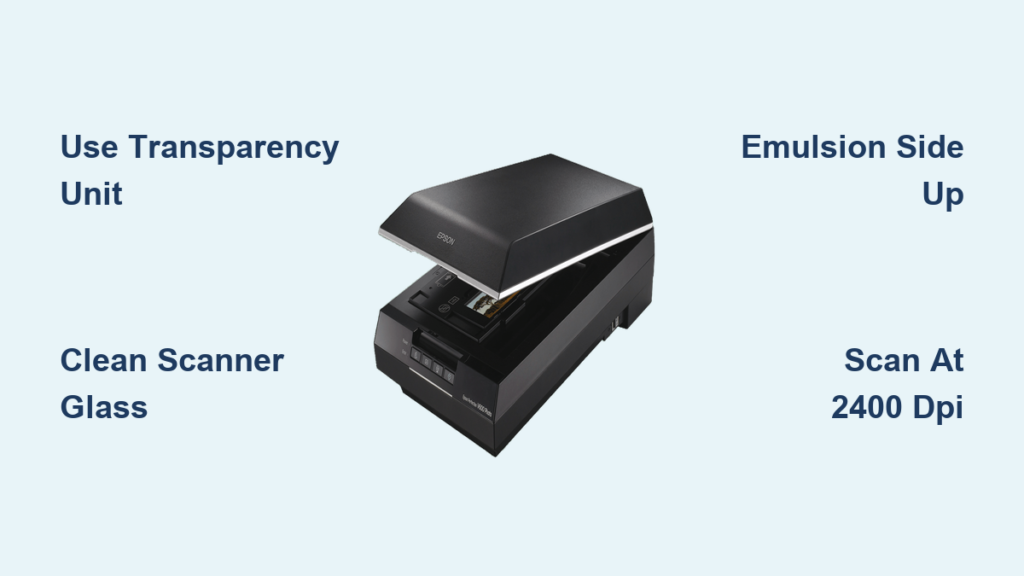
Clean the Scanner Glass Thoroughly
Open the scanner lid and use a blower brush or compressed air to remove loose particles from the glass surface. Wipe gently with a microfiber cloth, avoiding paper towels or cleaning chemicals that could leave residue. Inspect both the top and bottom glass surfaces if your scanner provides access to both sides.
Scan a blank area first to verify cleanliness. If specks appear in the preview, re-clean the glass before proceeding with your actual scans.
Handle Negatives Without Damage
Film is fragile and easily damaged by oils, fingerprints, or static electricity. Always handle negatives by the edges, wearing cotton gloves if possible to prevent skin oils from transferring to the emulsion. Avoid touching the emulsion side, which is the dull, textured surface of the film.
Clean Film Before Scanning
Even new negatives collect dust during handling and storage. Use a soft anti-static brush or air blower to remove debris before placing film in the scanner. For stubborn spots, hold a canned air duster at a 45-degree angle and use short bursts. Never use alcohol or cleaning liquids unless you are experienced with film handling.
Avoid compressed air with propellant chemicals, as some formulations can leave residue on the film surface.
Load Film Correctly for Best Results
Proper film orientation ensures sharp focus and correct image direction. Taking a moment to verify placement prevents wasted scanning time on misaligned images.
Insert Film Emulsion Side Up
Place the film with the emulsion side up, which means the dull side faces upward and the shiny side contacts the glass. This orientation matches the scanner’s focus plane for optimal sharpness. Reversing the film will not damage the scan but may flip text or orientation in the resulting image.
Warning: The scanner’s focus plane is set for film placed shiny-side down. Wrong orientation can cause soft or blurry scans that require significant editing to correct.
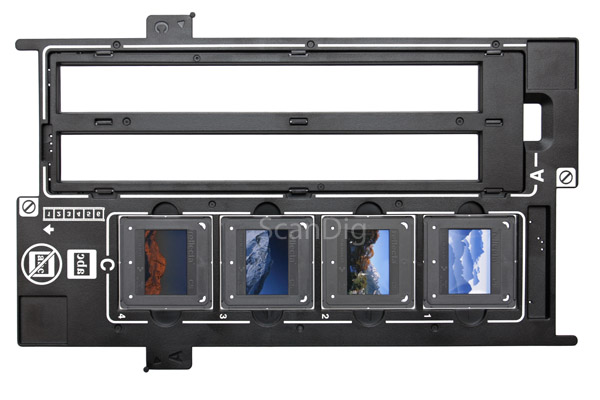
Use the Appropriate Film Holder
Epson scanners include plastic trays designed for specific film formats. Use the narrow slot for 35mm strips, accommodating up to six frames per strip. For 120 film, use the wide tray and align it with the scanner’s center backlight zone for even illumination.
If curly 120 film keeps slipping out of the included holder, third-party holders from brands like Lomography offer tighter grip and better support for problematic negatives.
Set Up Scanning Software for Quality Output
Epson’s scanning software provides comprehensive control when configured correctly. Using the right settings from the start prevents quality loss that cannot be recovered later.
Use Professional Mode in Epson Scan
Launch Epson Scan and select Professional Mode rather than Full Auto for full control over settings. Choose Film as the document type, then select the appropriate film format: Color Negative, Color Positive, or Black and White Negative.
Set Image Type to 48-bit color for best quality, which provides 16-bit per channel for maximum editing flexibility. For resolution, choose 1200 DPI for web sharing, 2400 DPI for prints up to 8×10 inches, and 4000 DPI for archival work on capable scanners like the V850 Pro.
Preview and Crop Frames Before Scanning
Always preview before running a full scan to verify framing and identify any issues. Click Preview to generate a low-resolution image, then view results as individual thumbnails to save each frame separately, or as a single strip for one composite file.
Adjust crop boxes around each negative, leaving a small border to avoid cutting off edges. Delete any unused frames from the preview to save scanning time.
Save Files in Lossless Format
Never lose image data early in your workflow. Save raw scans as TIFF or PNG formats, which preserve all captured detail without compression. Use JPEG only for final edited versions intended for sharing or web use. If you must use JPEG, set quality to maximum to minimize compression artifacts.
Use clear file names like Roll05_FrameA.tif for easy sorting and organization.
Try VueScan for Advanced Scanning Features
VueScan is third-party software that unlocks capabilities not available in scanner manufacturer’s native applications. Many users prefer it for its broader compatibility and advanced features.
Why Consider VueScan
VueScan works on Windows, Mac, and Linux operating systems, making it essential for users outside the Windows ecosystem. It supports the infrared channel on scanners like the V850 Pro, enabling Digital ICE-style dust removal regardless of your computer platform.
The software automatically detects film frames after preview, saving significant cropping time. It can output two files simultaneously: one 64-bit RGBI file for detailed editing and one JPEG for quick preview or sharing.
VueScan Workflow Process
Load 3 to 4 negative strips into the holder, then click Preview to generate thumbnails in about one minute. VueScan detects frames automatically, and you can rotate any that need adjustment. Click Scan to begin the full process, which takes approximately 20 minutes for 12 frames.
The scanner operates unattended during scanning, allowing you to work on other tasks while waiting.
Fix Common Scanning Problems
Several issues frequently affect negative scans, but each has straightforward solutions once you identify the cause.
Remove Dust and Debris
Dust appears as white spots on scans and is the most common problem encountered. Prevention starts with cleaning the scanner glass and film before every scan, using gloves and blowers to minimize particles reaching the surface.
For solutions, enable Digital ICE if your scanner and software support it. In post-processing, use Photoshop Spot Healing Brush or Clone Stamp to remove remaining specks.
Nothing ruins a scan faster than discovering dog fur or dust on your preview that requires re-scanning.
Prevent Newton’s Rings
Newton’s Rings are wavy, rainbow-like interference patterns caused by film directly contacting the scanner glass. Prevent this by using a film holder that keeps the negative slightly elevated above the glass surface. Some users insert anti-static paper or thin diffusion sheets between film and glass.
Never press down on the scanner lid, as this forces the film into contact with the glass and creates interference patterns.
Stop Film from Slipping During Scanning
Curly 120 film often shifts out of position in standard Epson trays, resulting in misaligned scans. Seat film ends fully in the holder slots, using gentle pressure to ensure secure placement. Consider a Lomography holder known for tighter grip on medium format film.
Practice makes this process easier over time.
Edit Scans for Optimal Results
Raw scans require post-processing to achieve their full potential. Color negatives especially need adjustment to look natural.
Use Appropriate Editing Software
Adobe Photoshop offers the most control over every aspect of your scan. Lightroom excels at batch editing multiple frames from the same roll. Darktable provides excellent free functionality for Linux users.
Make Essential Adjustments
Focus on color balance first, correcting any color casts by targeting skin tones and natural greens. Adjust exposure using histogram references for accuracy. Apply subtle contrast enhancement to add depth without crushing shadows or blowing highlights.
For color films, subtle saturation adjustments bring vibrancy back. For experimental films like Lomochrome Purple or Revolog films, minimal editing preserves the intentional creative effects. Black and white negatives require only exposure and contrast adjustments.
Preserve Original Scans for Future Editing
Keep unedited master files in 16-bit TIFF or DNG format for maximum editing flexibility. Export smaller JPEG versions for sharing and web use. Organize files with clear naming conventions like Roll01_FrameA.tif and Roll01_Corrected.jpg.
Archive and Organize Your Digital Negatives
Proper organization ensures you can find and access your scanned images for years to come.
Save Originals in High-Quality Formats
Always keep a master file in lossless format. Save raw scans as 16-bit TIFF, DNG, or PNG. If using VueScan, preserve the RGBI file for maximum editing headroom. Store originals on external drives and consider cloud backup for redundancy.
Export Smaller Versions for Sharing
Create optimized JPEGs at 90 to 100 percent quality for sharing. Resize for web use, typically 1920 pixels wide. Use sRGB color profile for consistent online display across devices.
Organize Files Logically
Use descriptive folder names and file prefixes. Example: folder named 2024-06_Roll05_KodakPortra with files labeled Roll05_A.tif and Roll05_A_Corrected.jpg. Add metadata including date, film type, and camera in Lightroom or darktable for comprehensive organization.
Frequently Asked Questions About Scanning Negatives
Can any scanner scan negatives?
No. Only scanners with a transparency unit, also called a backlight or film adapter, can scan negatives. Standard flatbed scanners without this feature will produce black images because they cannot illuminate film from behind.
What resolution should I use for scanning negatives?
For web sharing, 1200 DPI works well. For prints up to 8×10 inches, use 2400 DPI. For archival quality or large prints, 4000 DPI provides the highest detail but only on scanners like the Epson V850 Pro that support this resolution.
How do I prevent dust from appearing on my scans?
Clean both the scanner glass and the film before scanning. Use a blower brush to remove loose particles, and handle negatives with cotton gloves to prevent oil transfer. Enable Digital ICE if your setup supports it for automatic dust removal.
Why do I see rainbow rings on my scans?
These are Newton’s Rings, caused by the film touching the scanner glass. Use a film holder that keeps the film slightly elevated, and avoid pressing down on the scanner lid during scanning.
What is the best scanner for home negative scanning?
The Epson Perfection V600 offers the best balance of price and performance for most users. It supports multiple film formats, includes film holders, and delivers excellent quality for under $300. The V850 Pro is worth the investment if you need archival-quality scans with Digital ICE technology.
Do I need special software to scan negatives?
Your scanner includes native software that works for basic scanning. However, VueScan provides advanced features including IR cleaning on Mac and Linux, making it worthwhile for serious hobbyists.
Key Takeaways for Scanning Negatives Successfully
Scanning negatives at home is a rewarding process that gives you complete creative control over your film photography. Start with an Epson V600 or V850 Pro equipped with a transparency unit, as this feature is essential for reading film properly. Clean your scanner glass and film before every session to minimize dust problems in post-processing. Place negatives emulsion side up in the appropriate holder, scan at 2400 to 4000 DPI depending on your needs, and save original files in lossless 16-bit formats for maximum editing flexibility.
Use VueScan if you need infrared dust removal on Mac or Linux, and plan for batch scanning to maximize efficiency. Edit your scans carefully, preserving experimental film effects while correcting color balance on standard negative film. Finally, organize and back up your digital files to preserve your scanned negatives for future generations.
You do not need expensive equipment to achieve excellent results. With an Epson V600 and this guide, you have everything needed to begin digitizing your film collection and preserving precious memories.